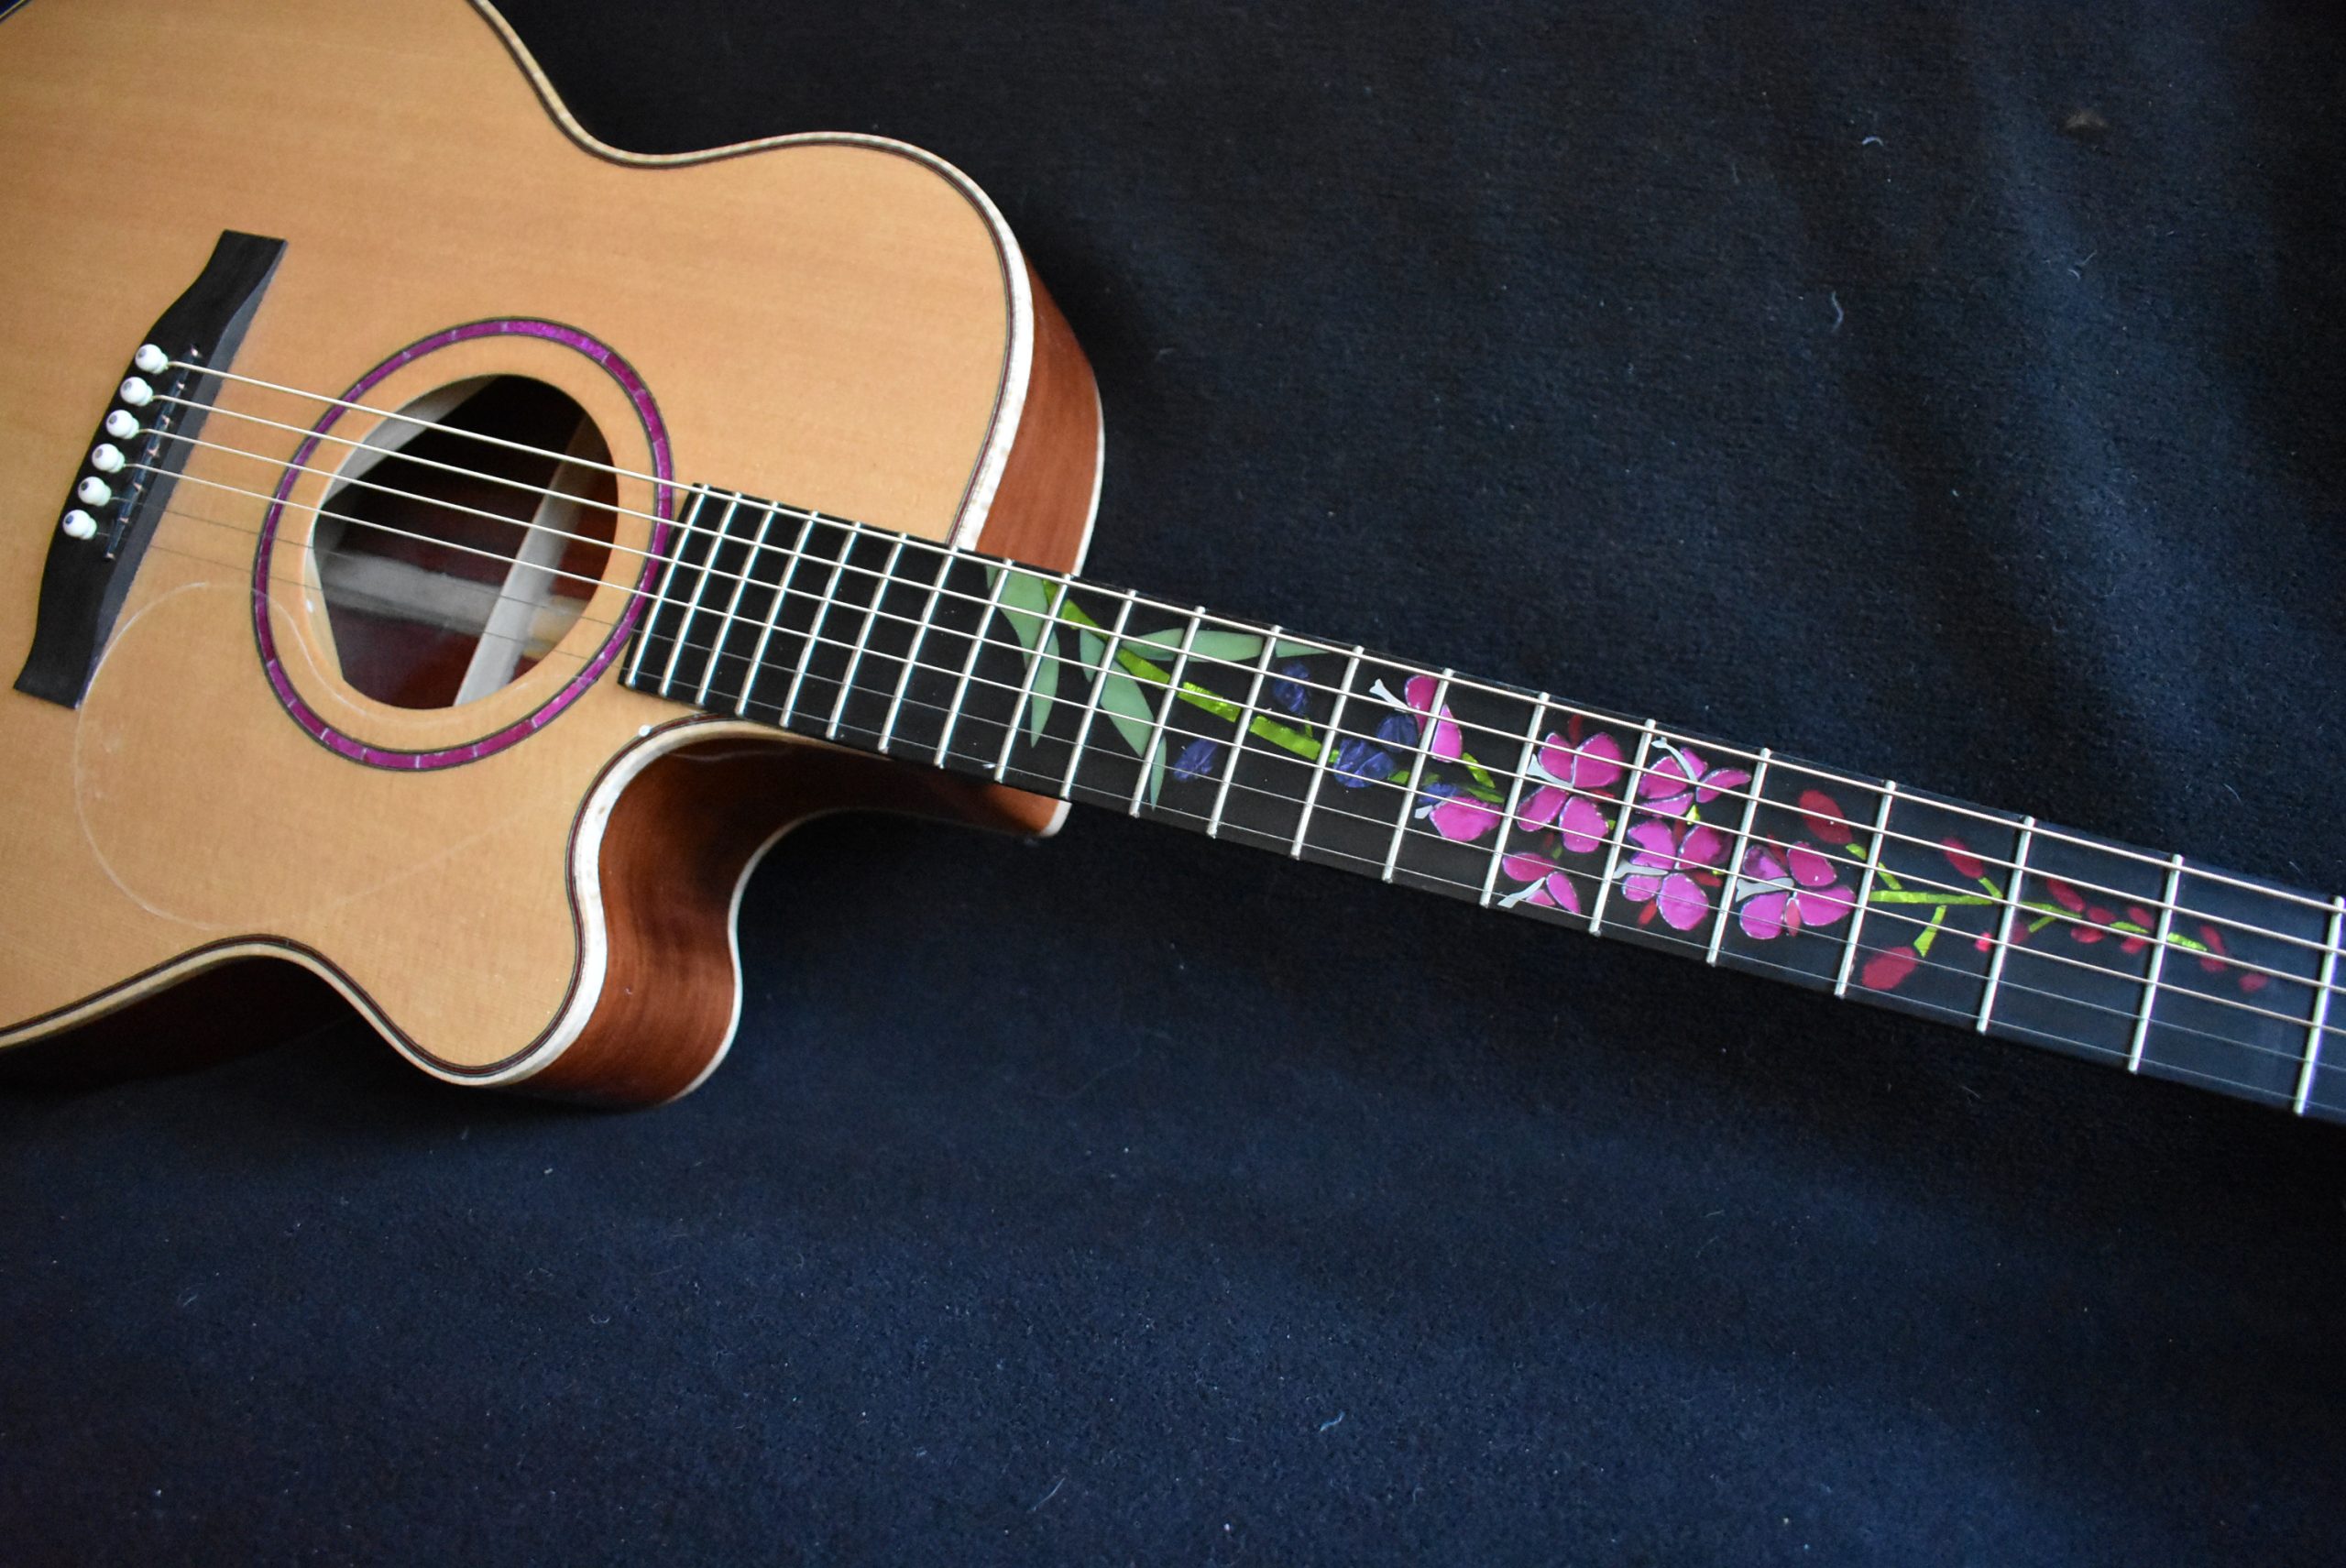
"Fireweed"
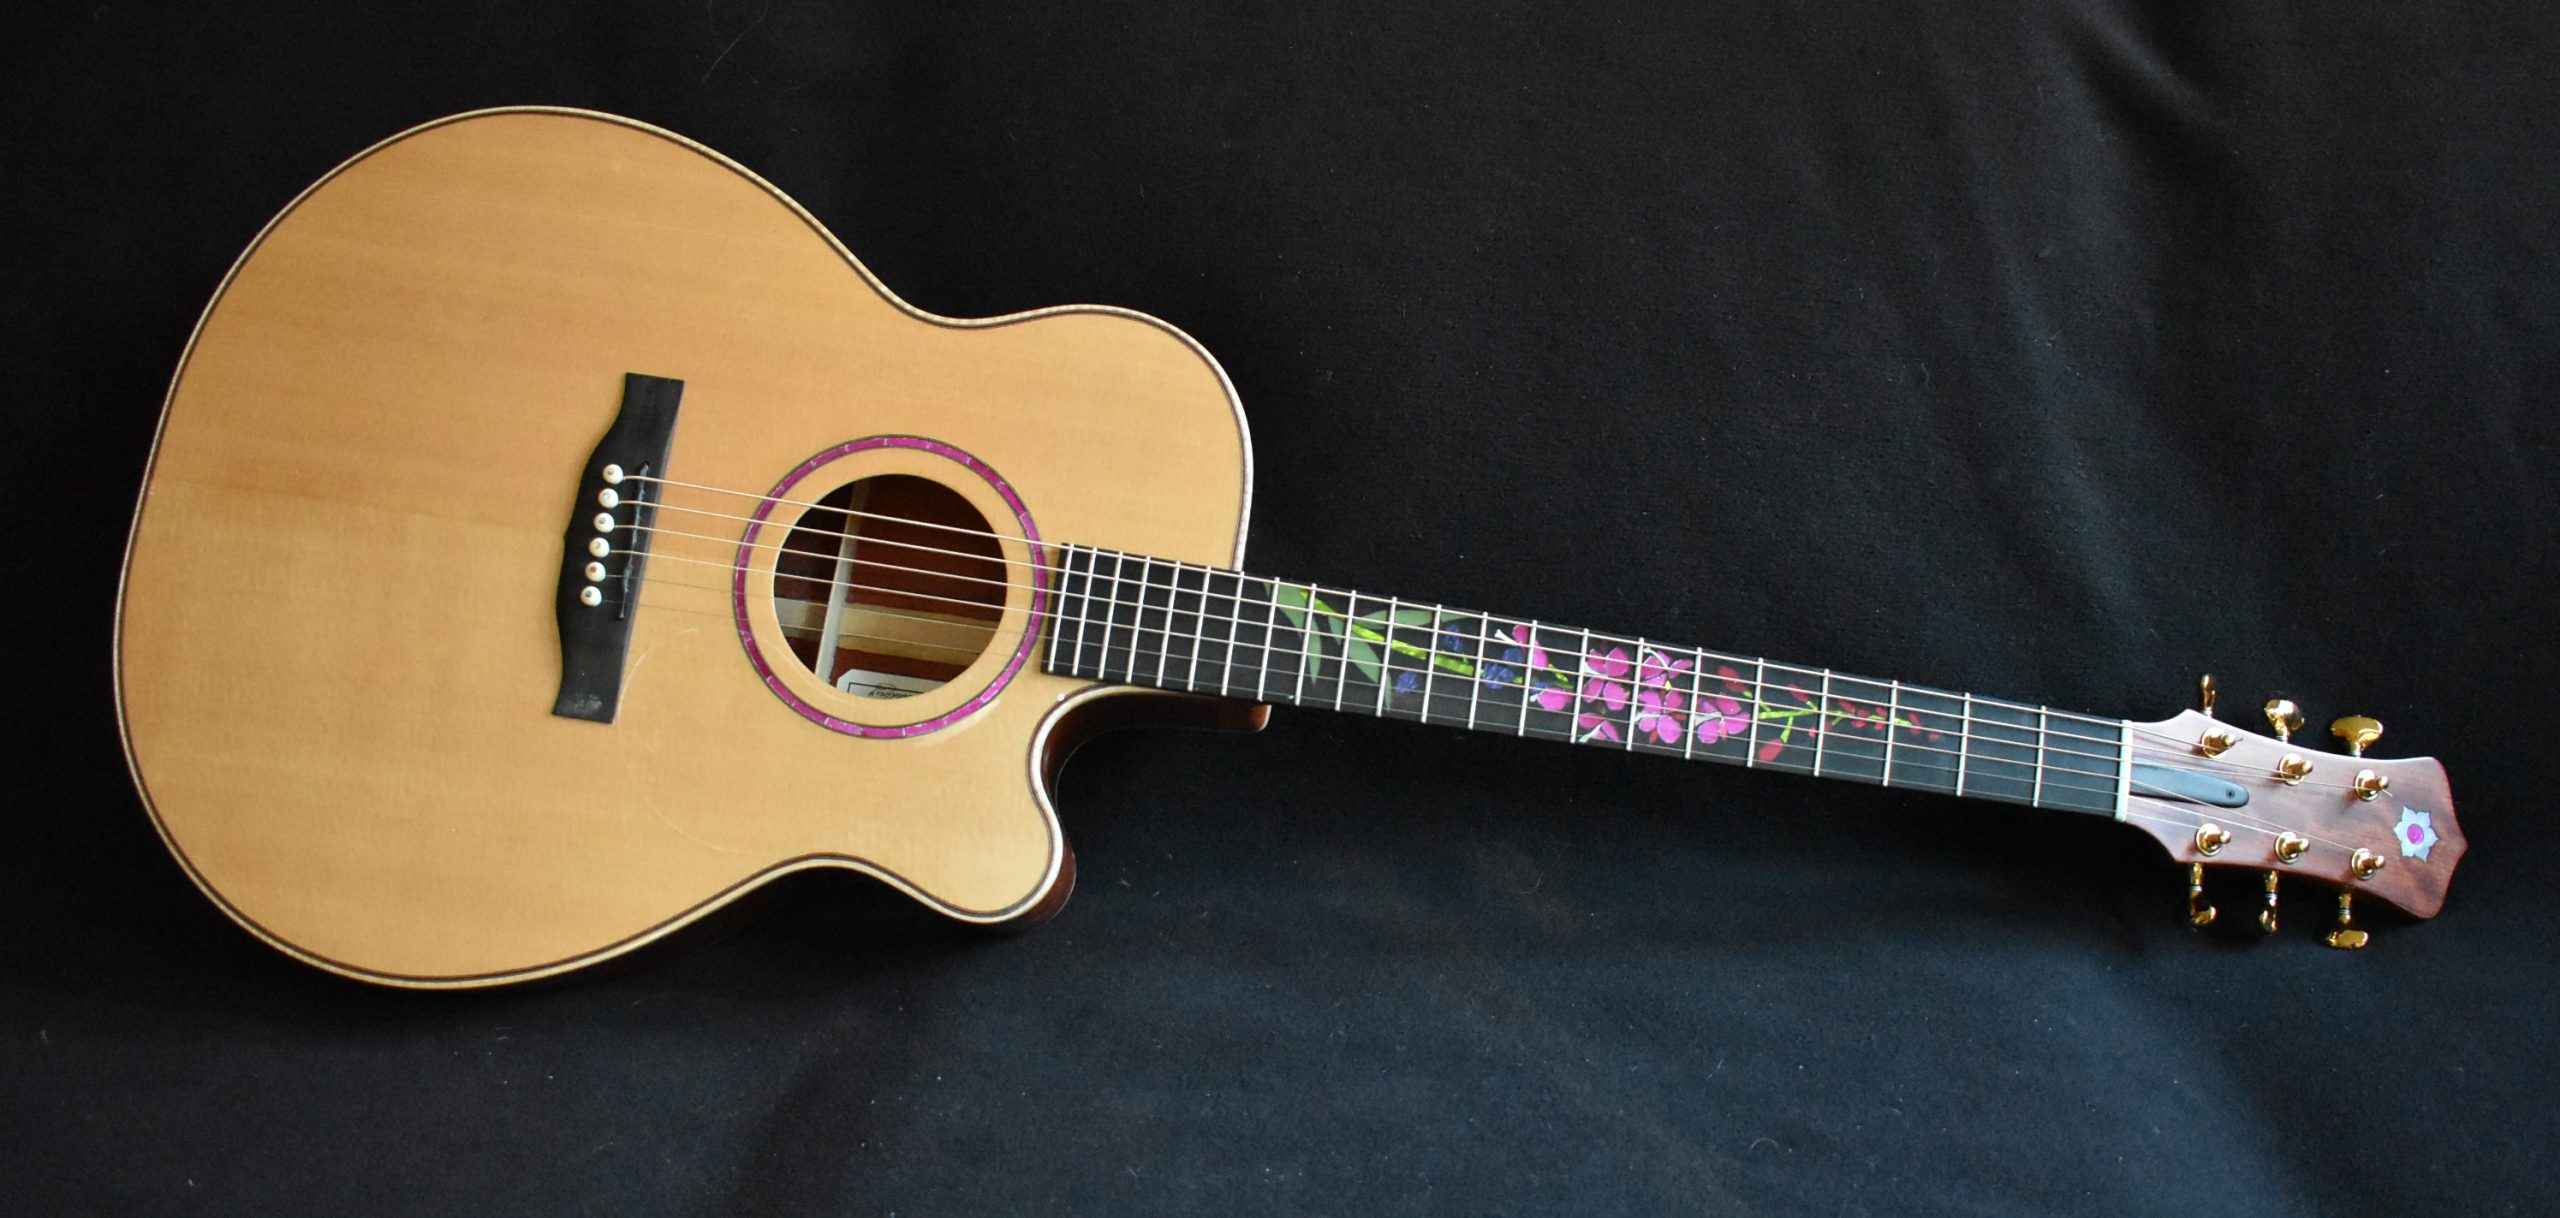
I made this guitar for William, a guitarist in Southern California. The top is Sitka spruce, the back and sides are bloodwood, the neck is mahogany, and the bridge and fingerboard are ebony. The body is 16" across the lower bout. William wanted an acoustic guitar that has the feel of playing an electric, so the slim neck has 16 frets clear of the body. The most striking feature of the guitar is the inlay. William has spent a lot of time in Alaska, so he chose fireweed, which grows in abundance here.
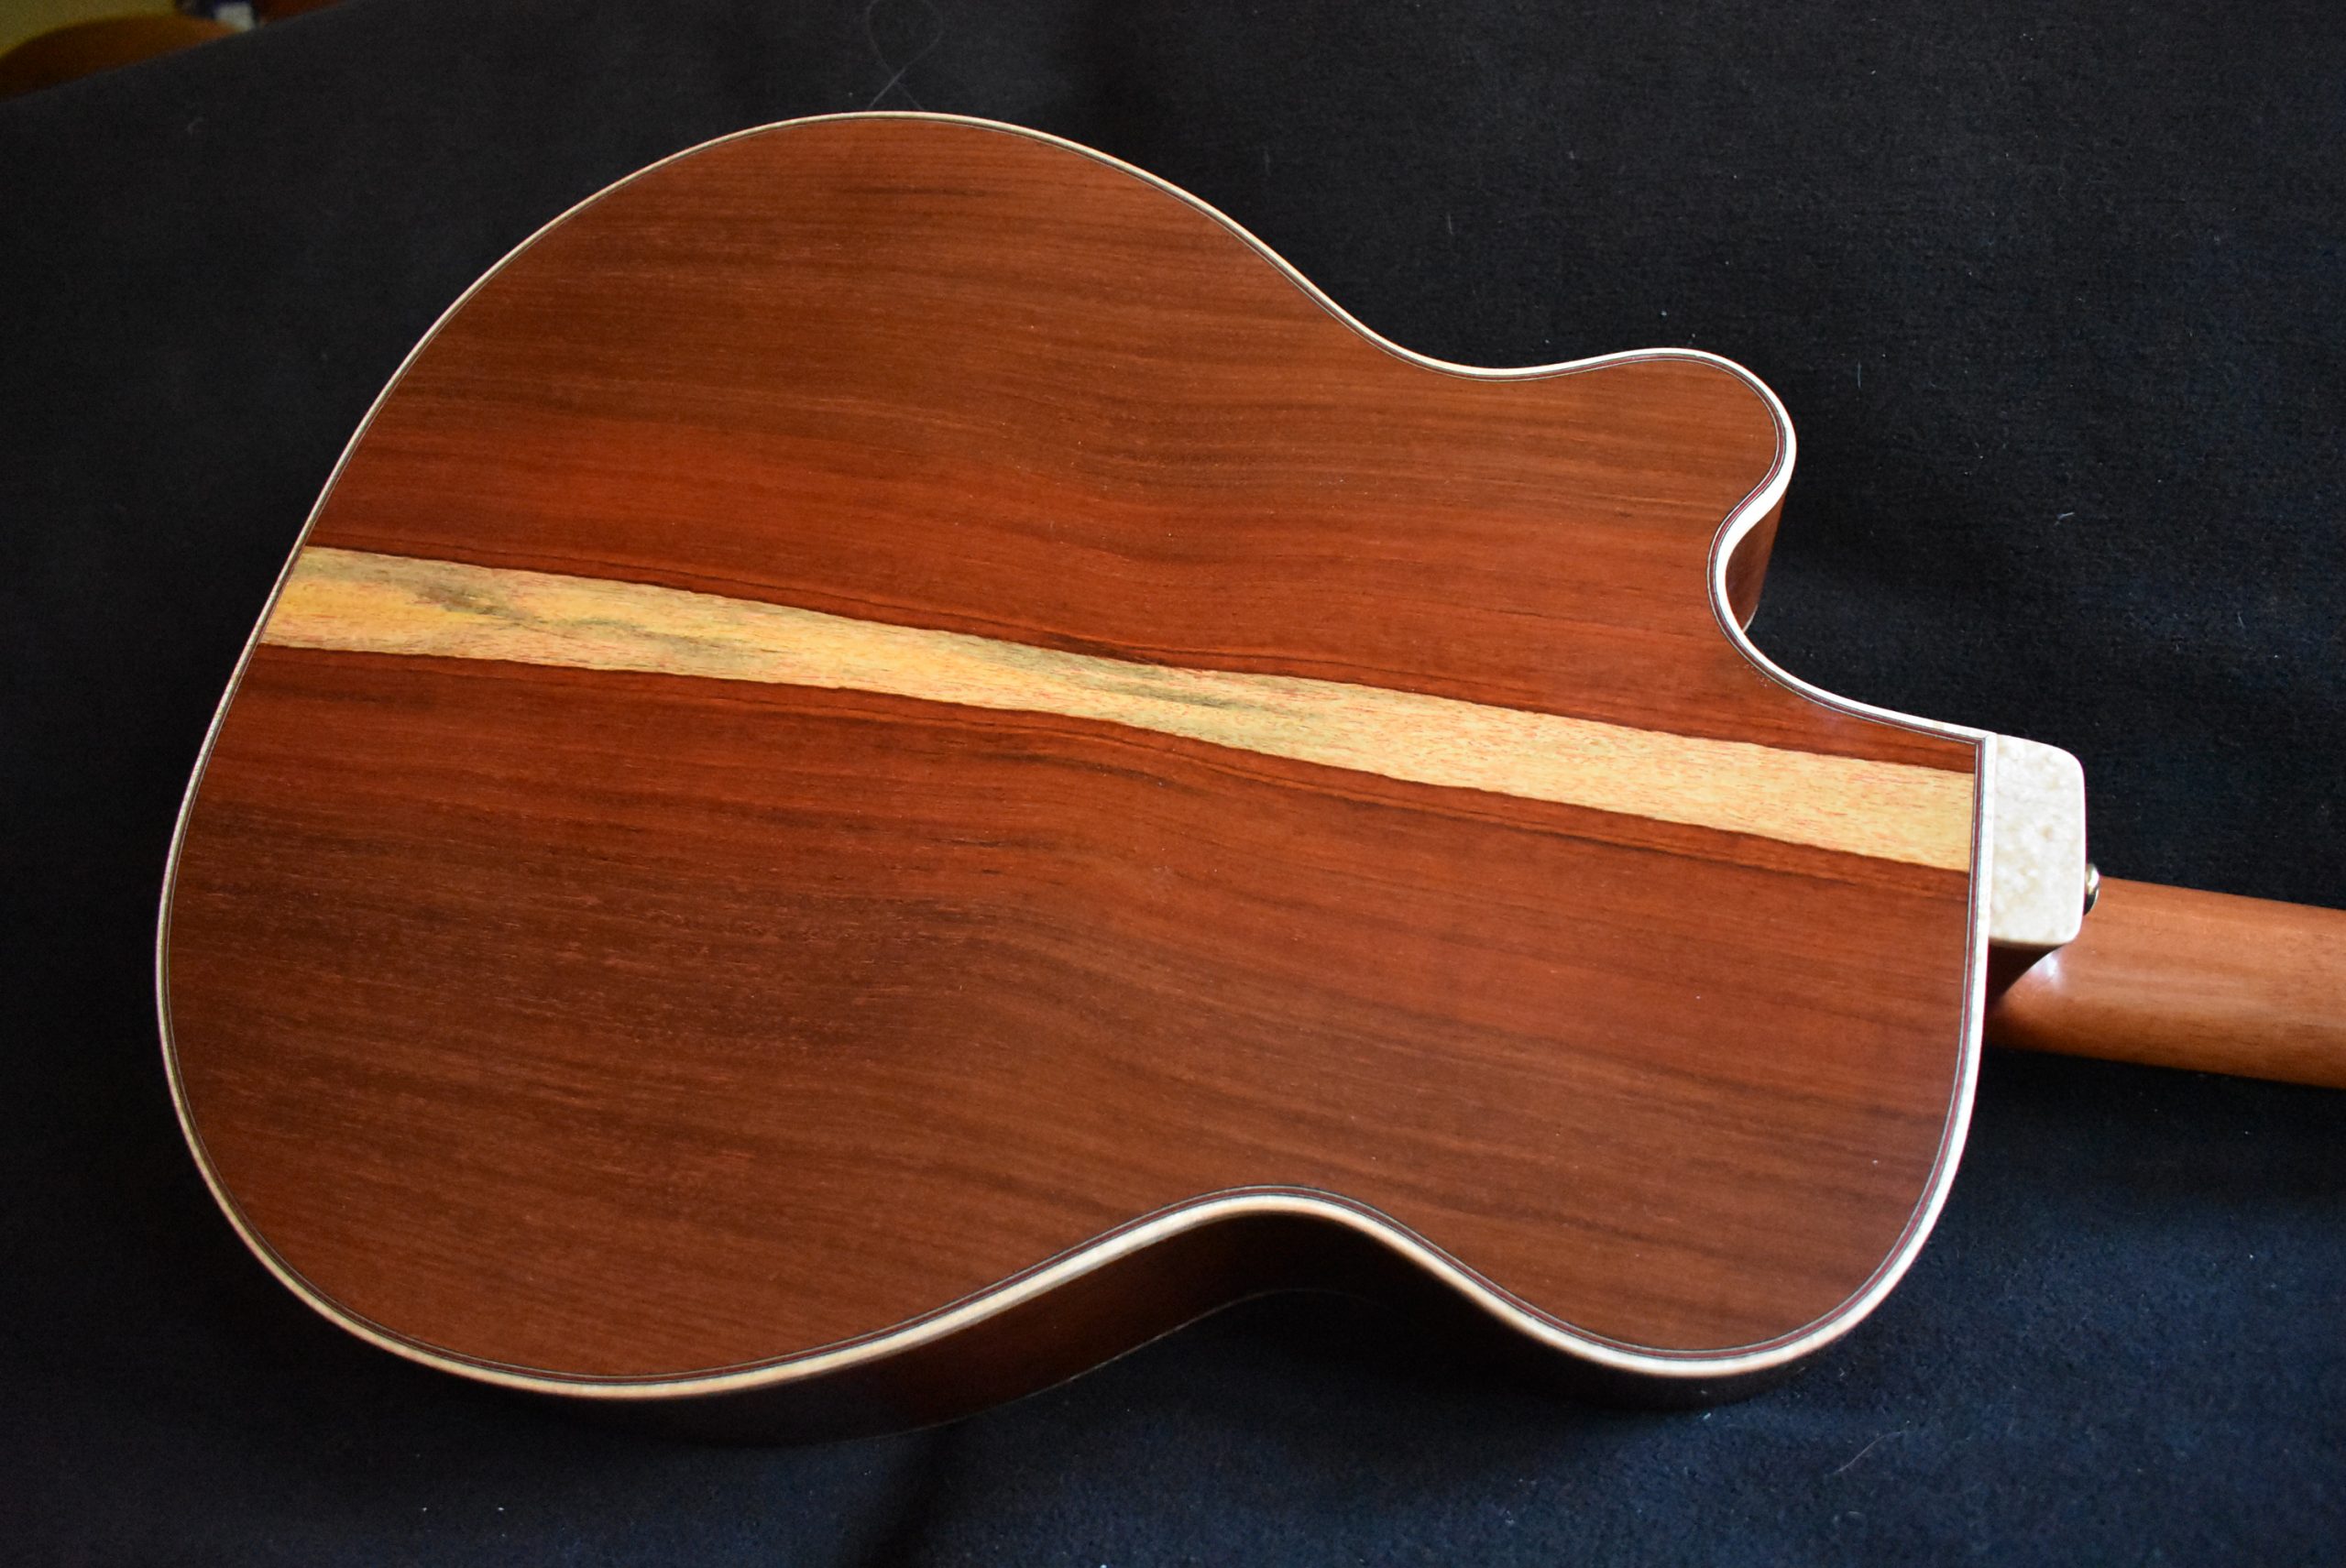
This bloodwood has a bit of yellow sapwood along one edge. When the two halves of the back are bookmatched it makes an interesting stripe down the middle. Bloodwood is very hard, and it reflects the vibration of the top very quickly out the soundhole. This results in a very focused, punchy sound.
Making the Fireweed Inlay - Working With Glass
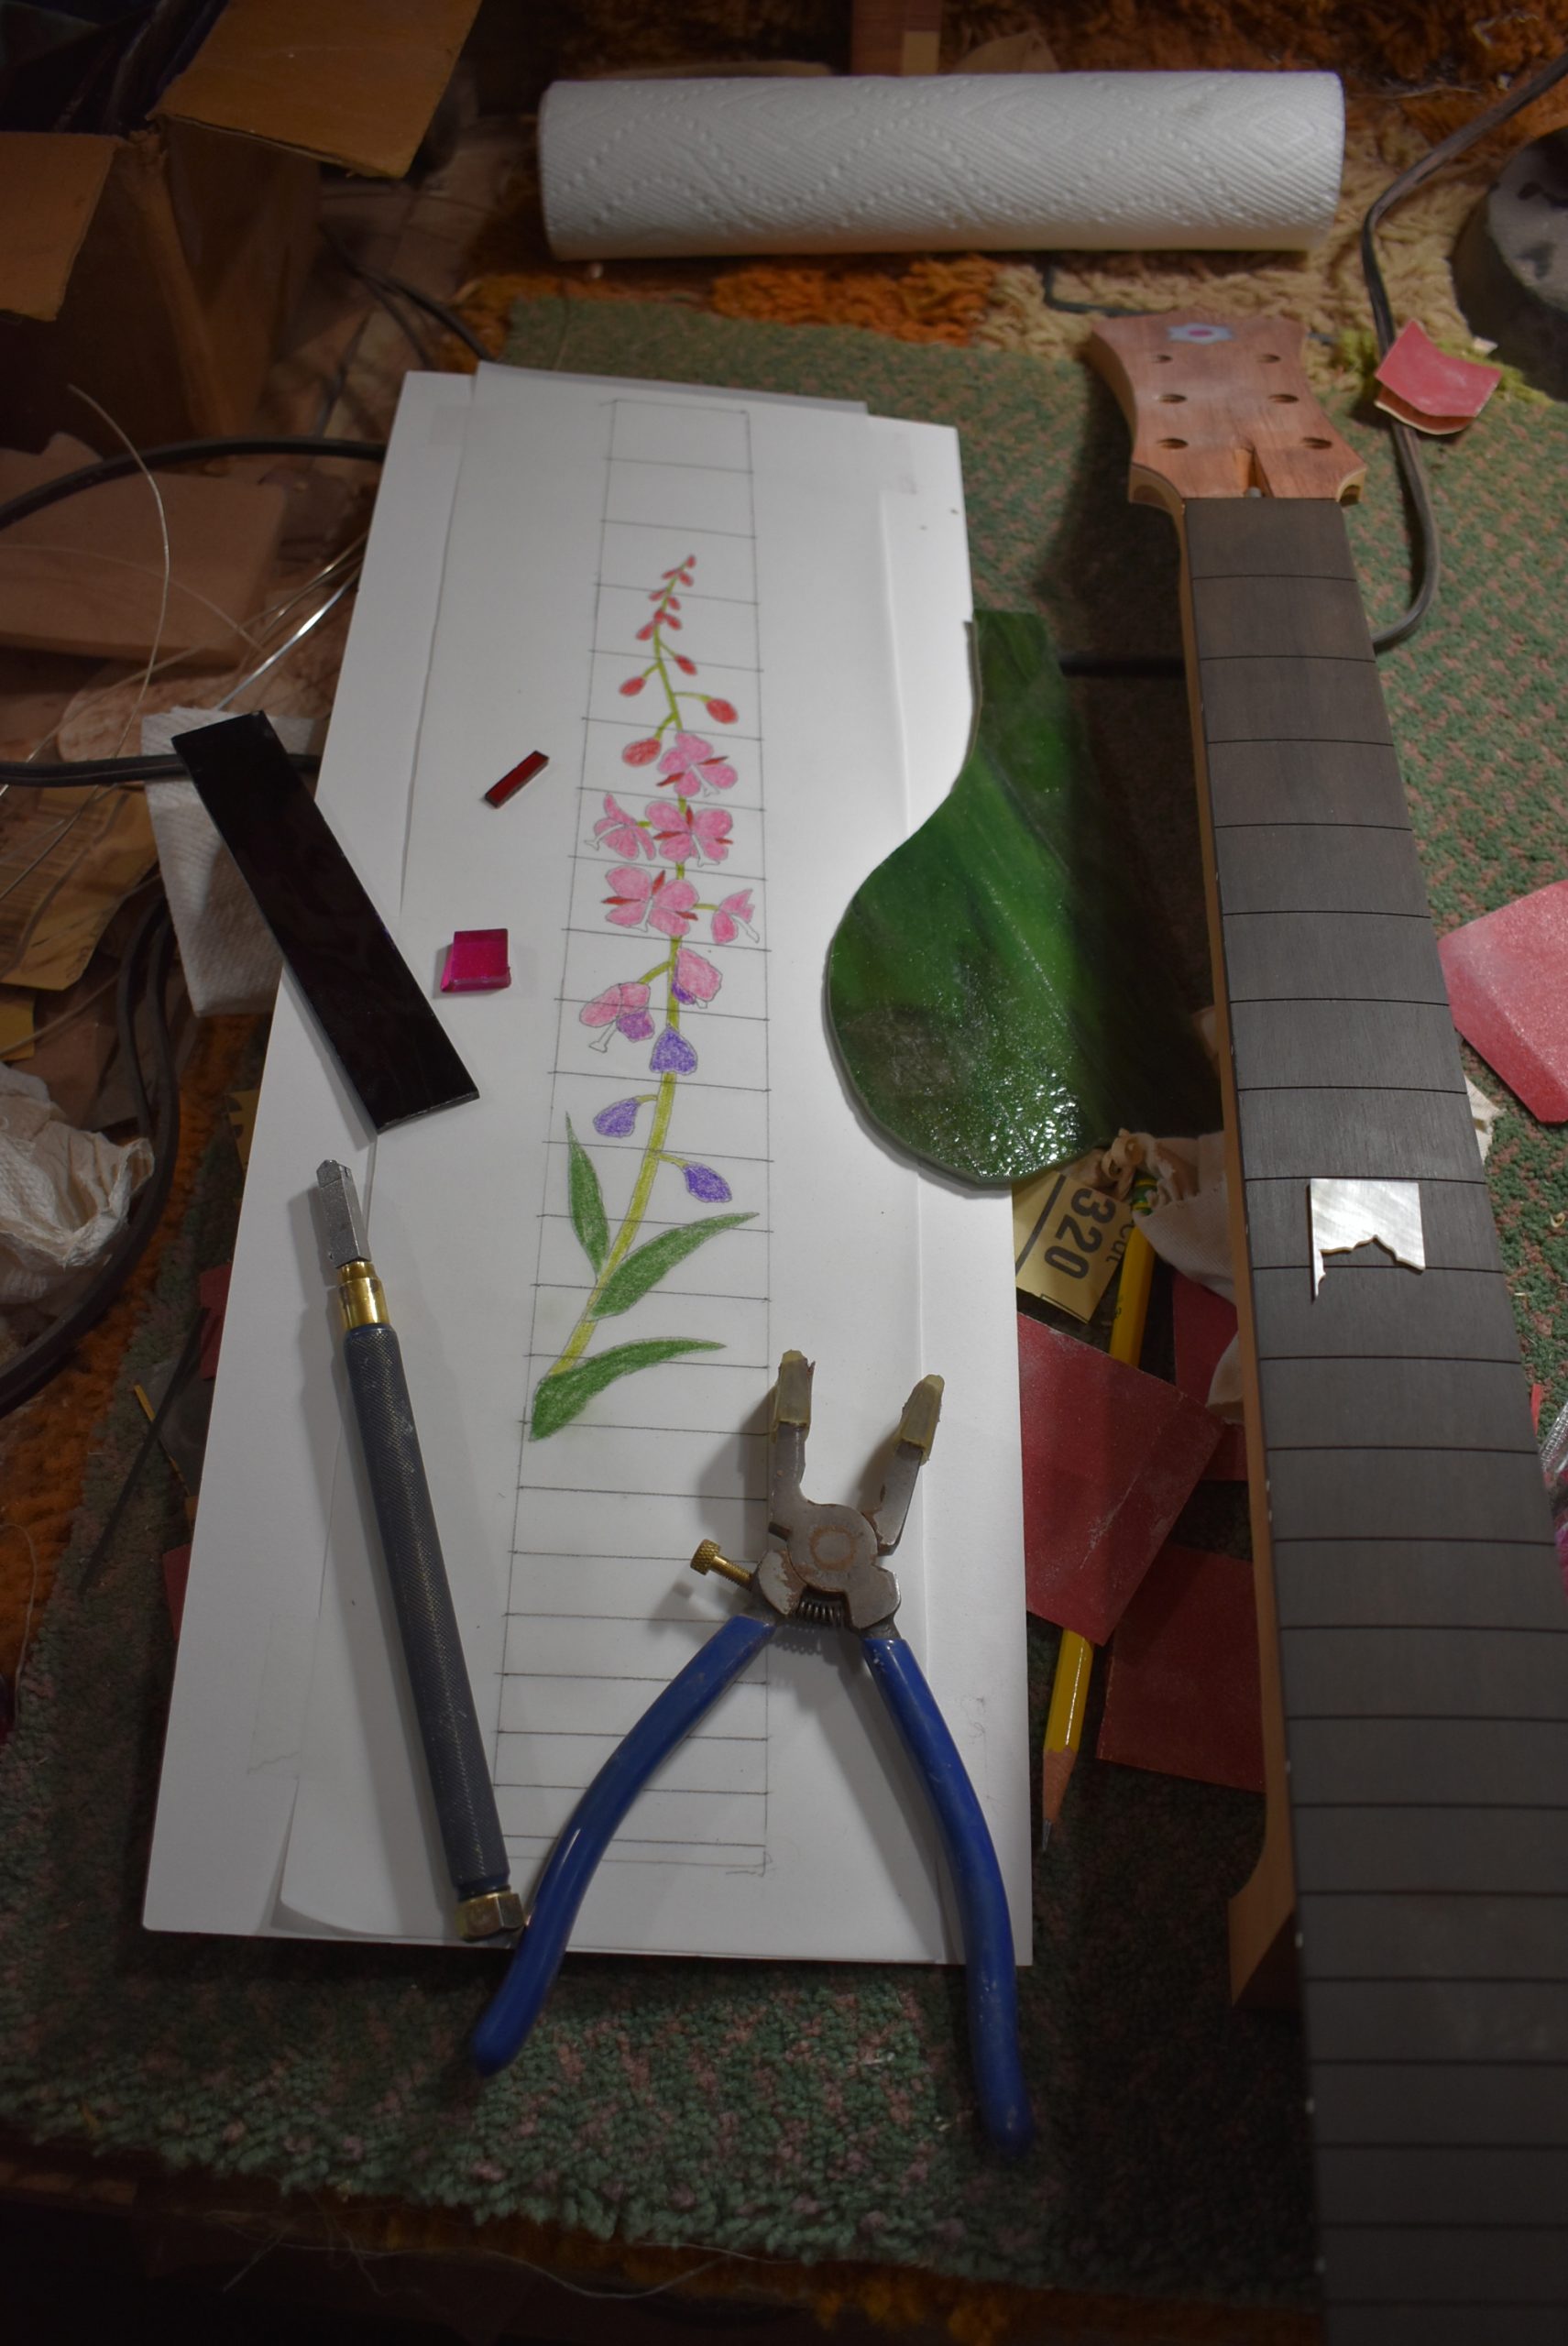 The inlay starts with a pattern. In this case I drew the fireweed stalk onto a fingerboard pattern with colored pencil. This defines each piece of the inlay not only by shape, but also by color. The materials are various colors of glass, and mother of pearl. A glass cutter is on the lower left. Next to it are glass pliers. These have rubber coated curved jaws that break the glass on the line scored by the cutter.
Another important tool is a glass grinder. I have a variety of bits of different grits and diameters.
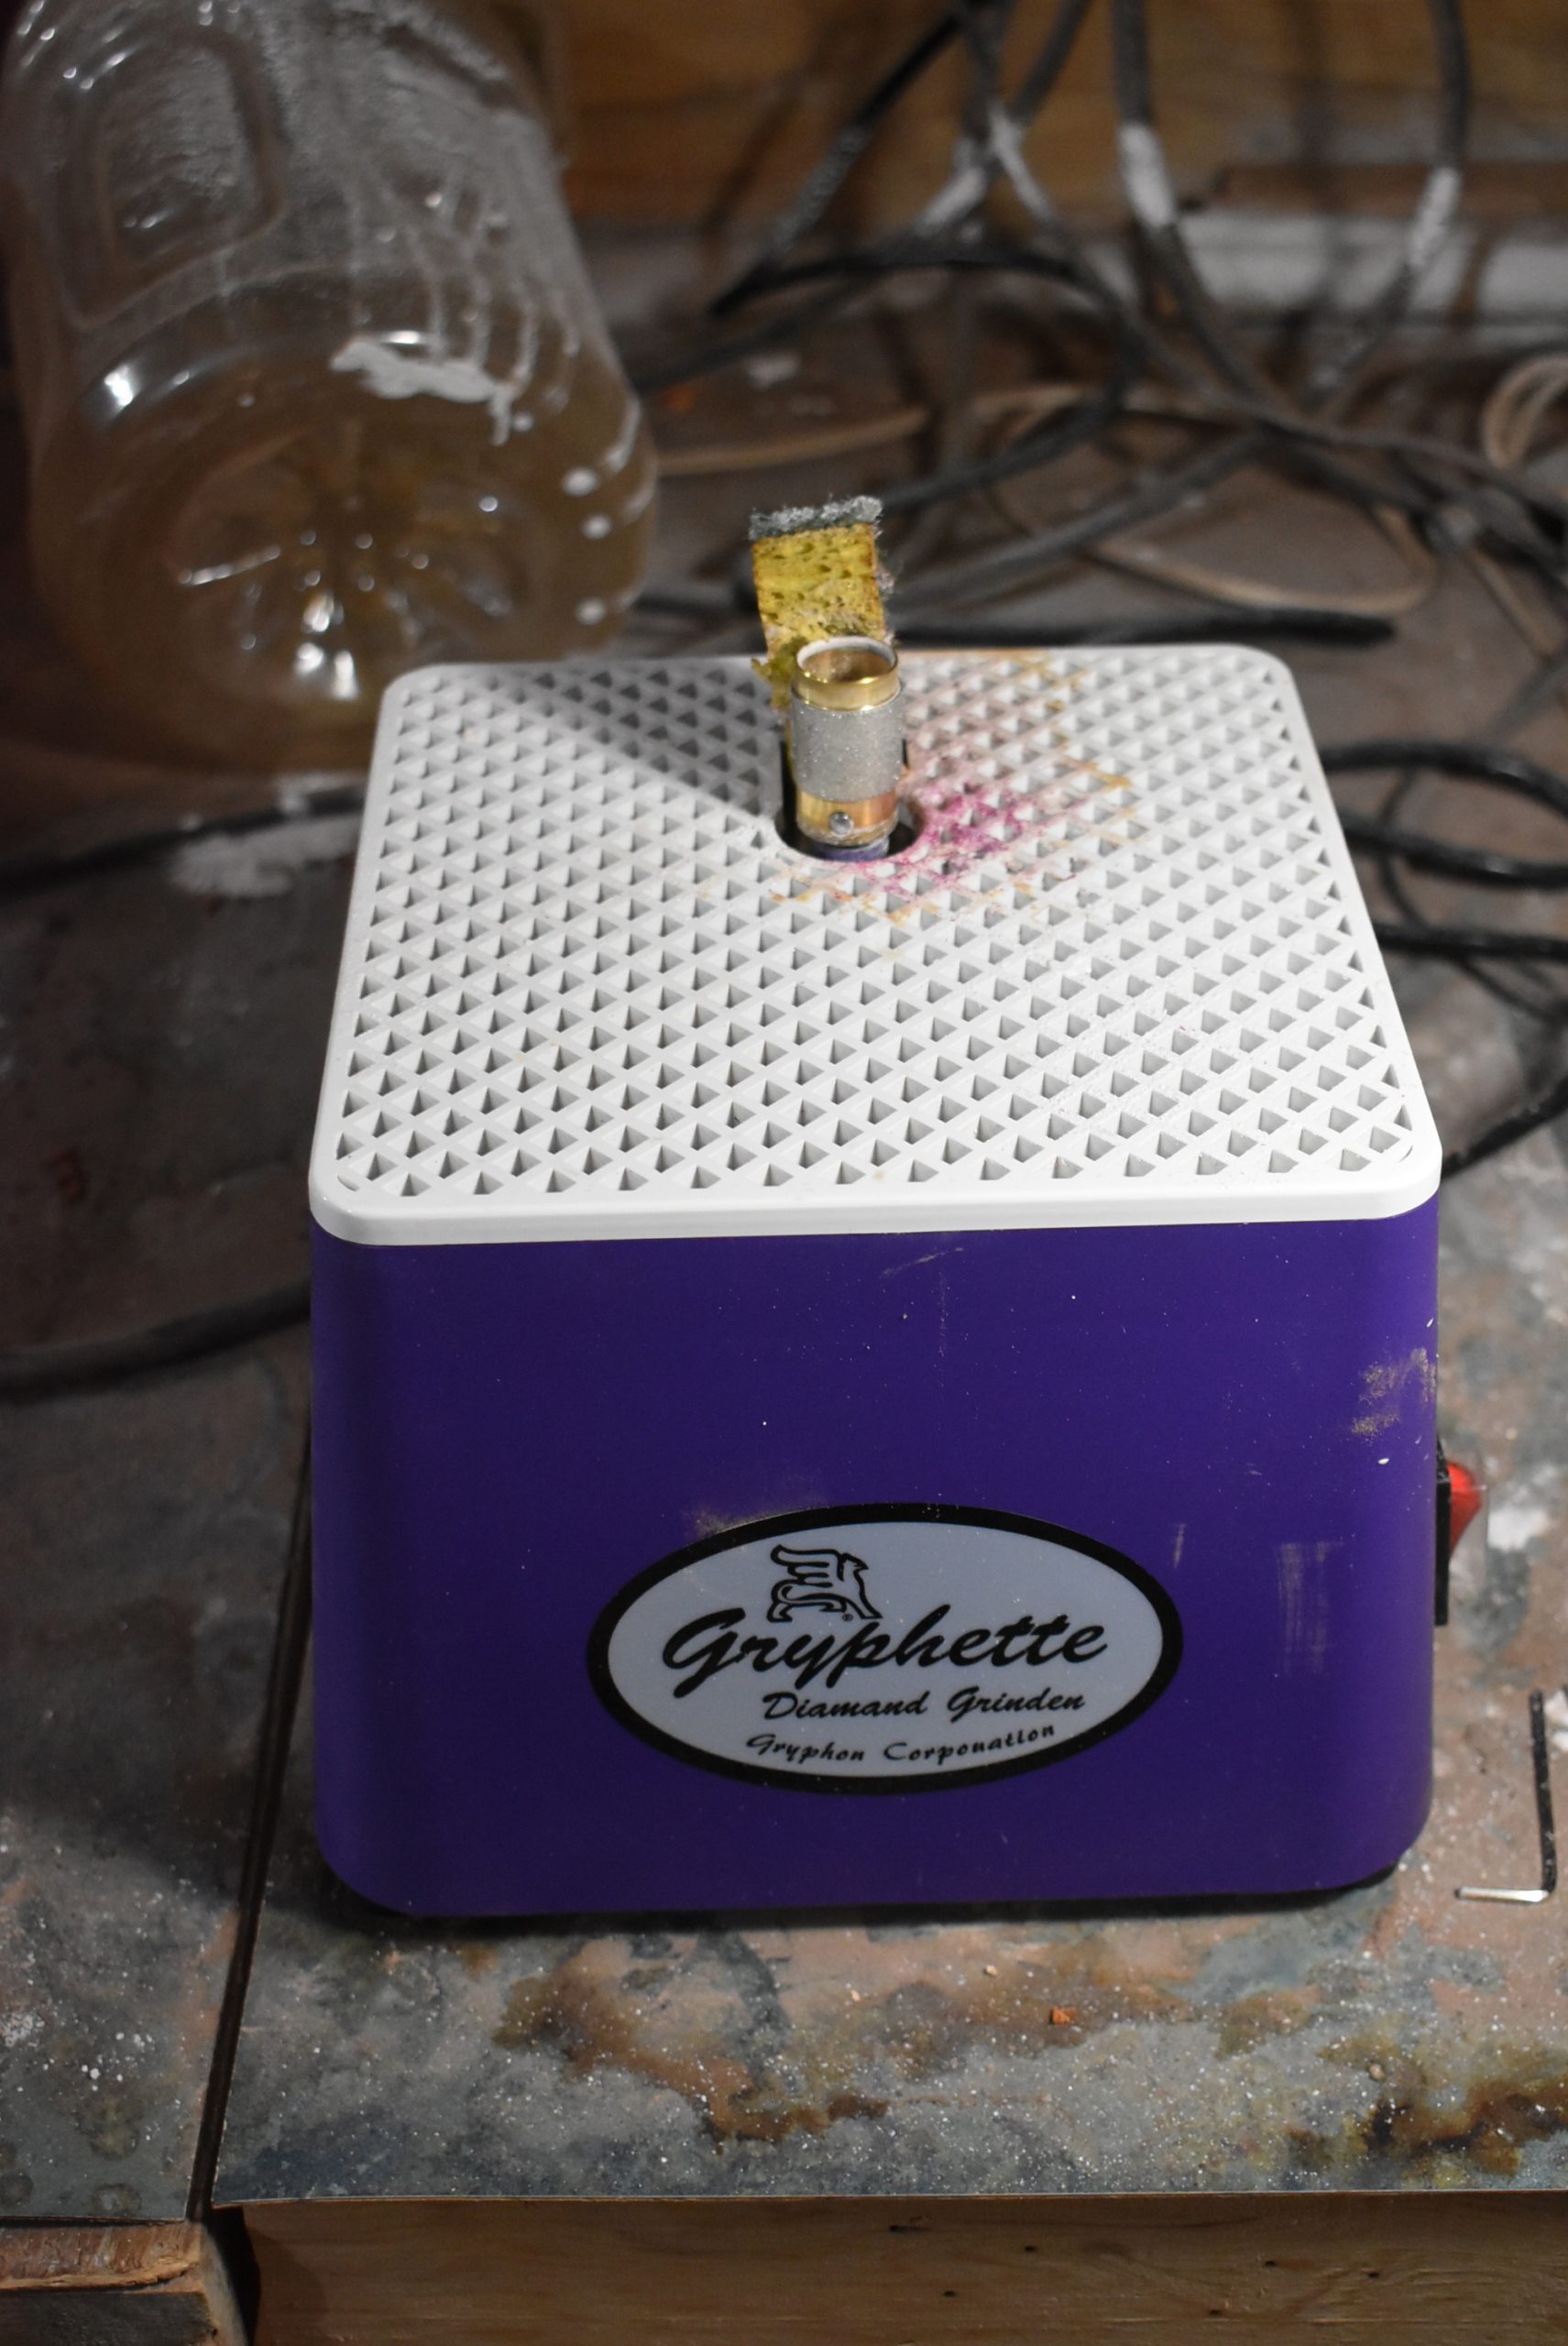
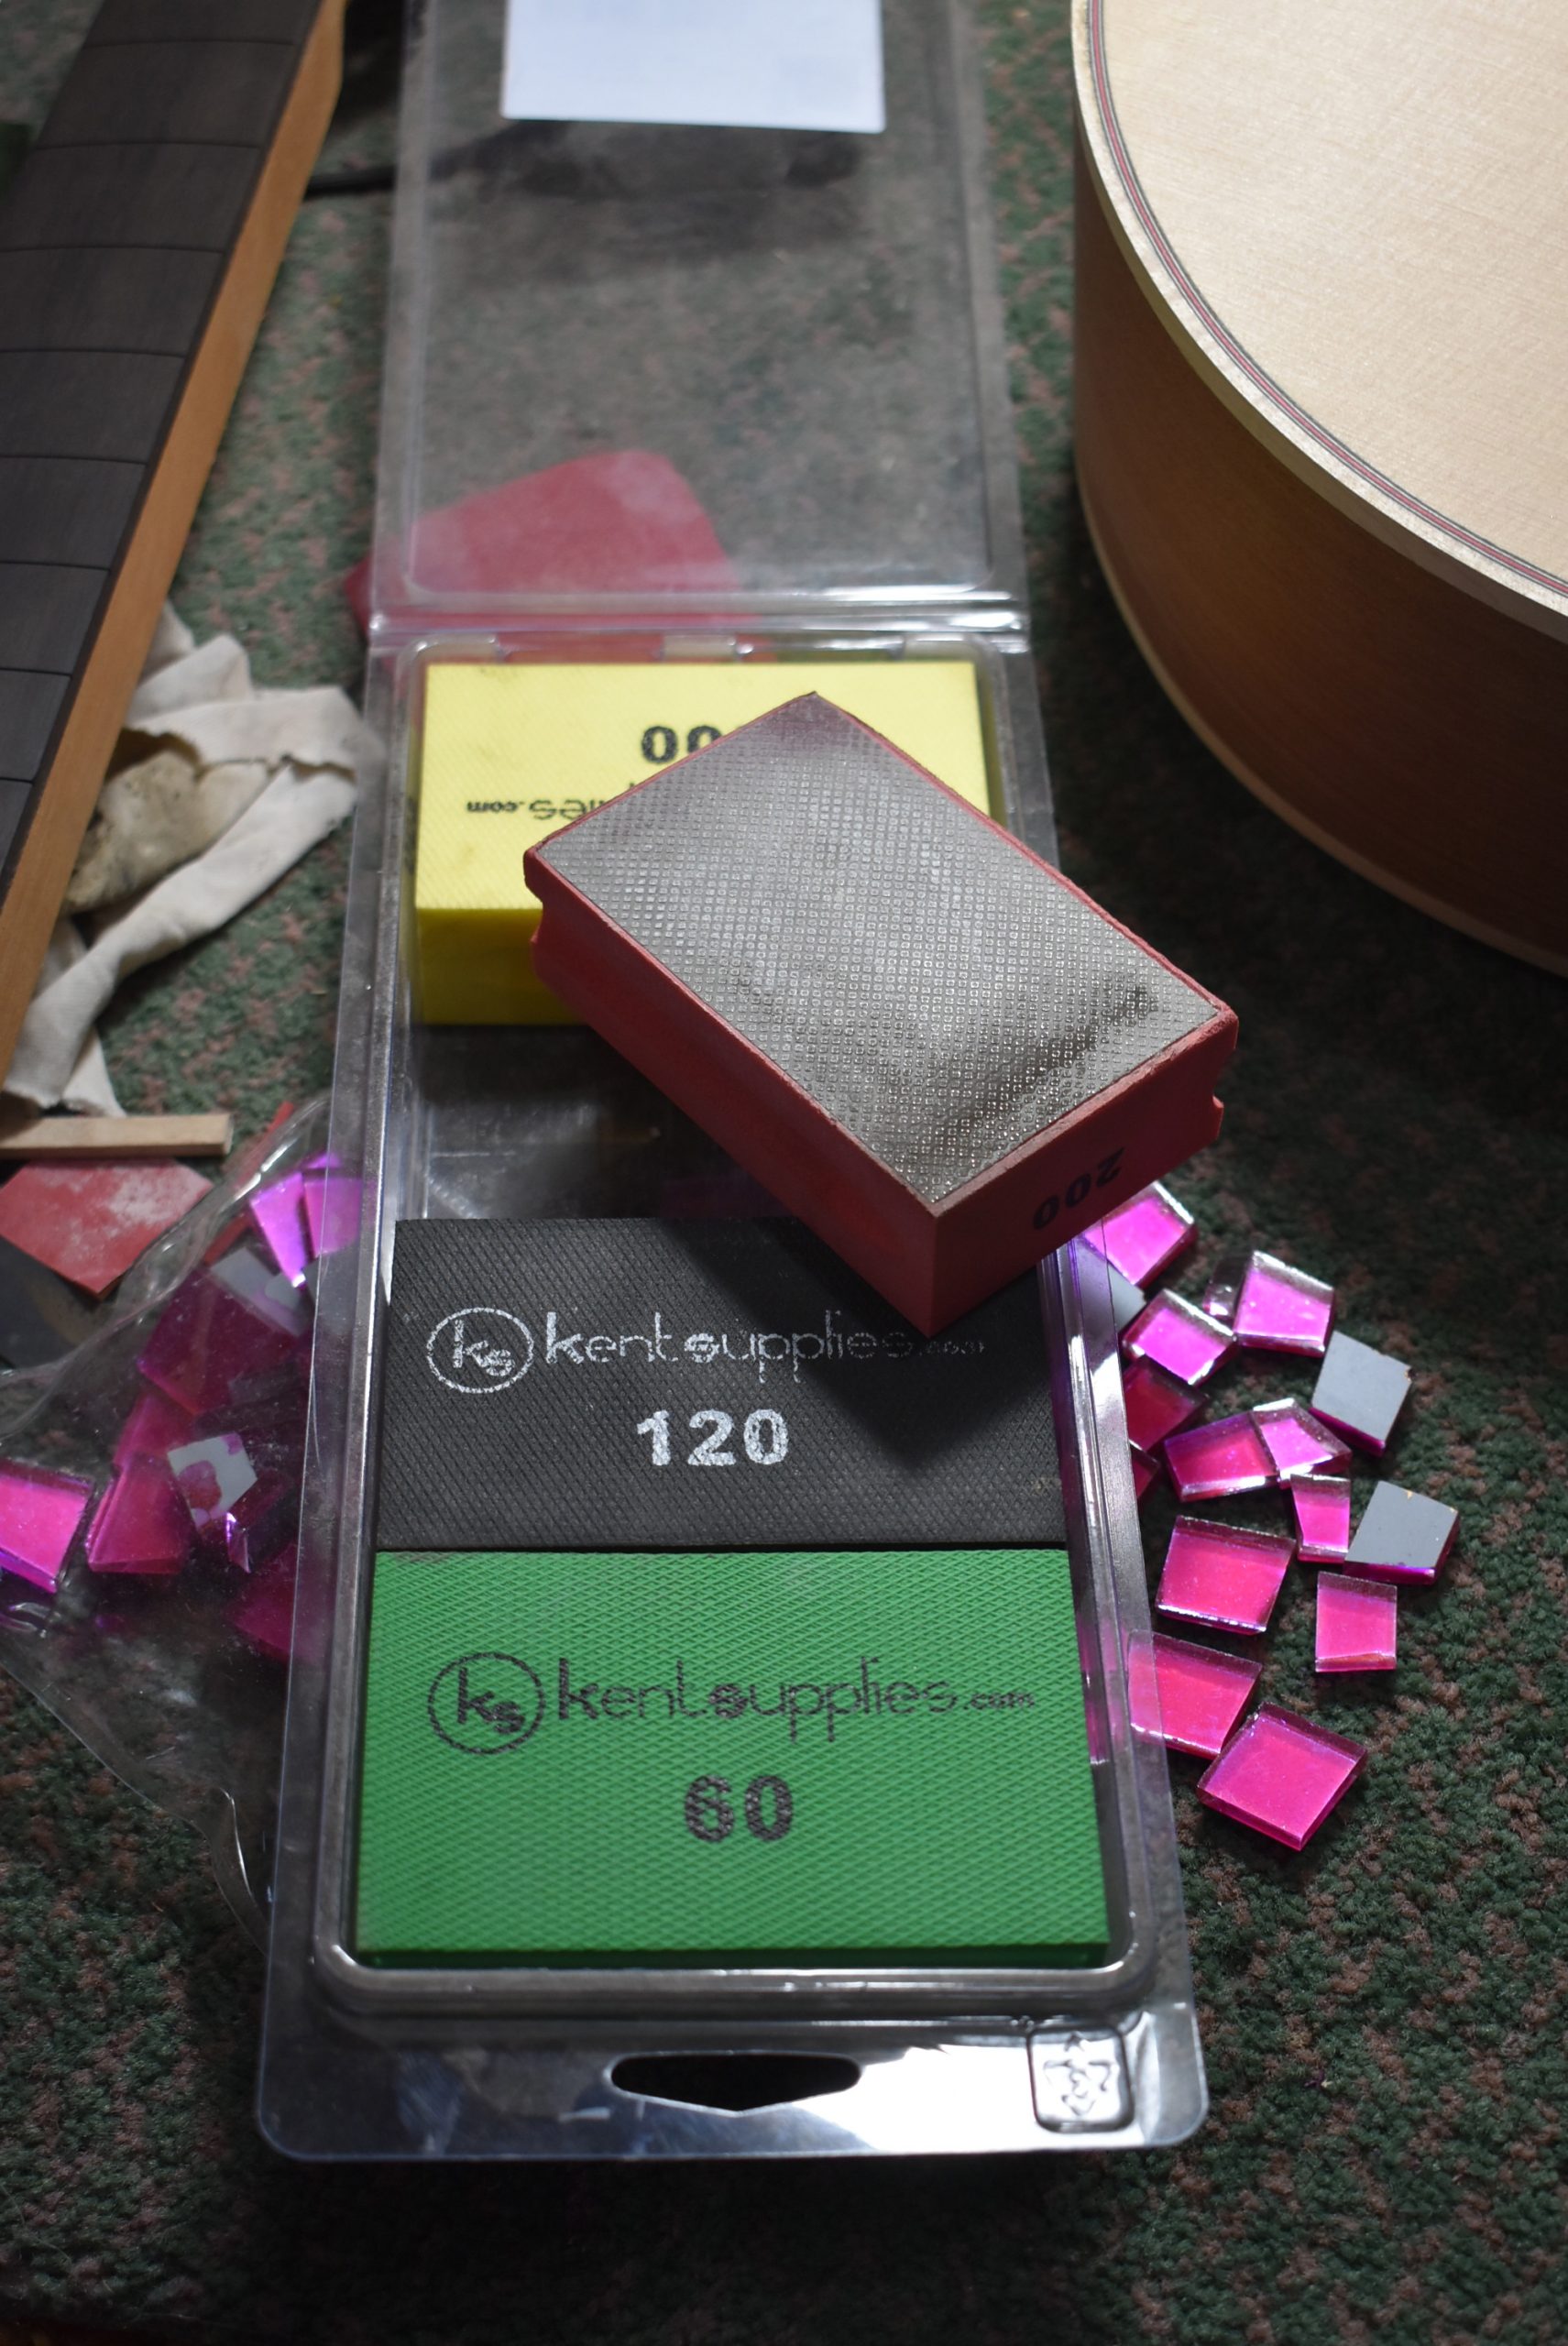
These diamond grit blocks are essential for flattening the inlay. If all you have is sandpaper, it will take days of sanding and many sheets of sandpaper. Note the pieces of magenta glass. You can get these from websites that supply mosaic artists. These came from Dick Blick.
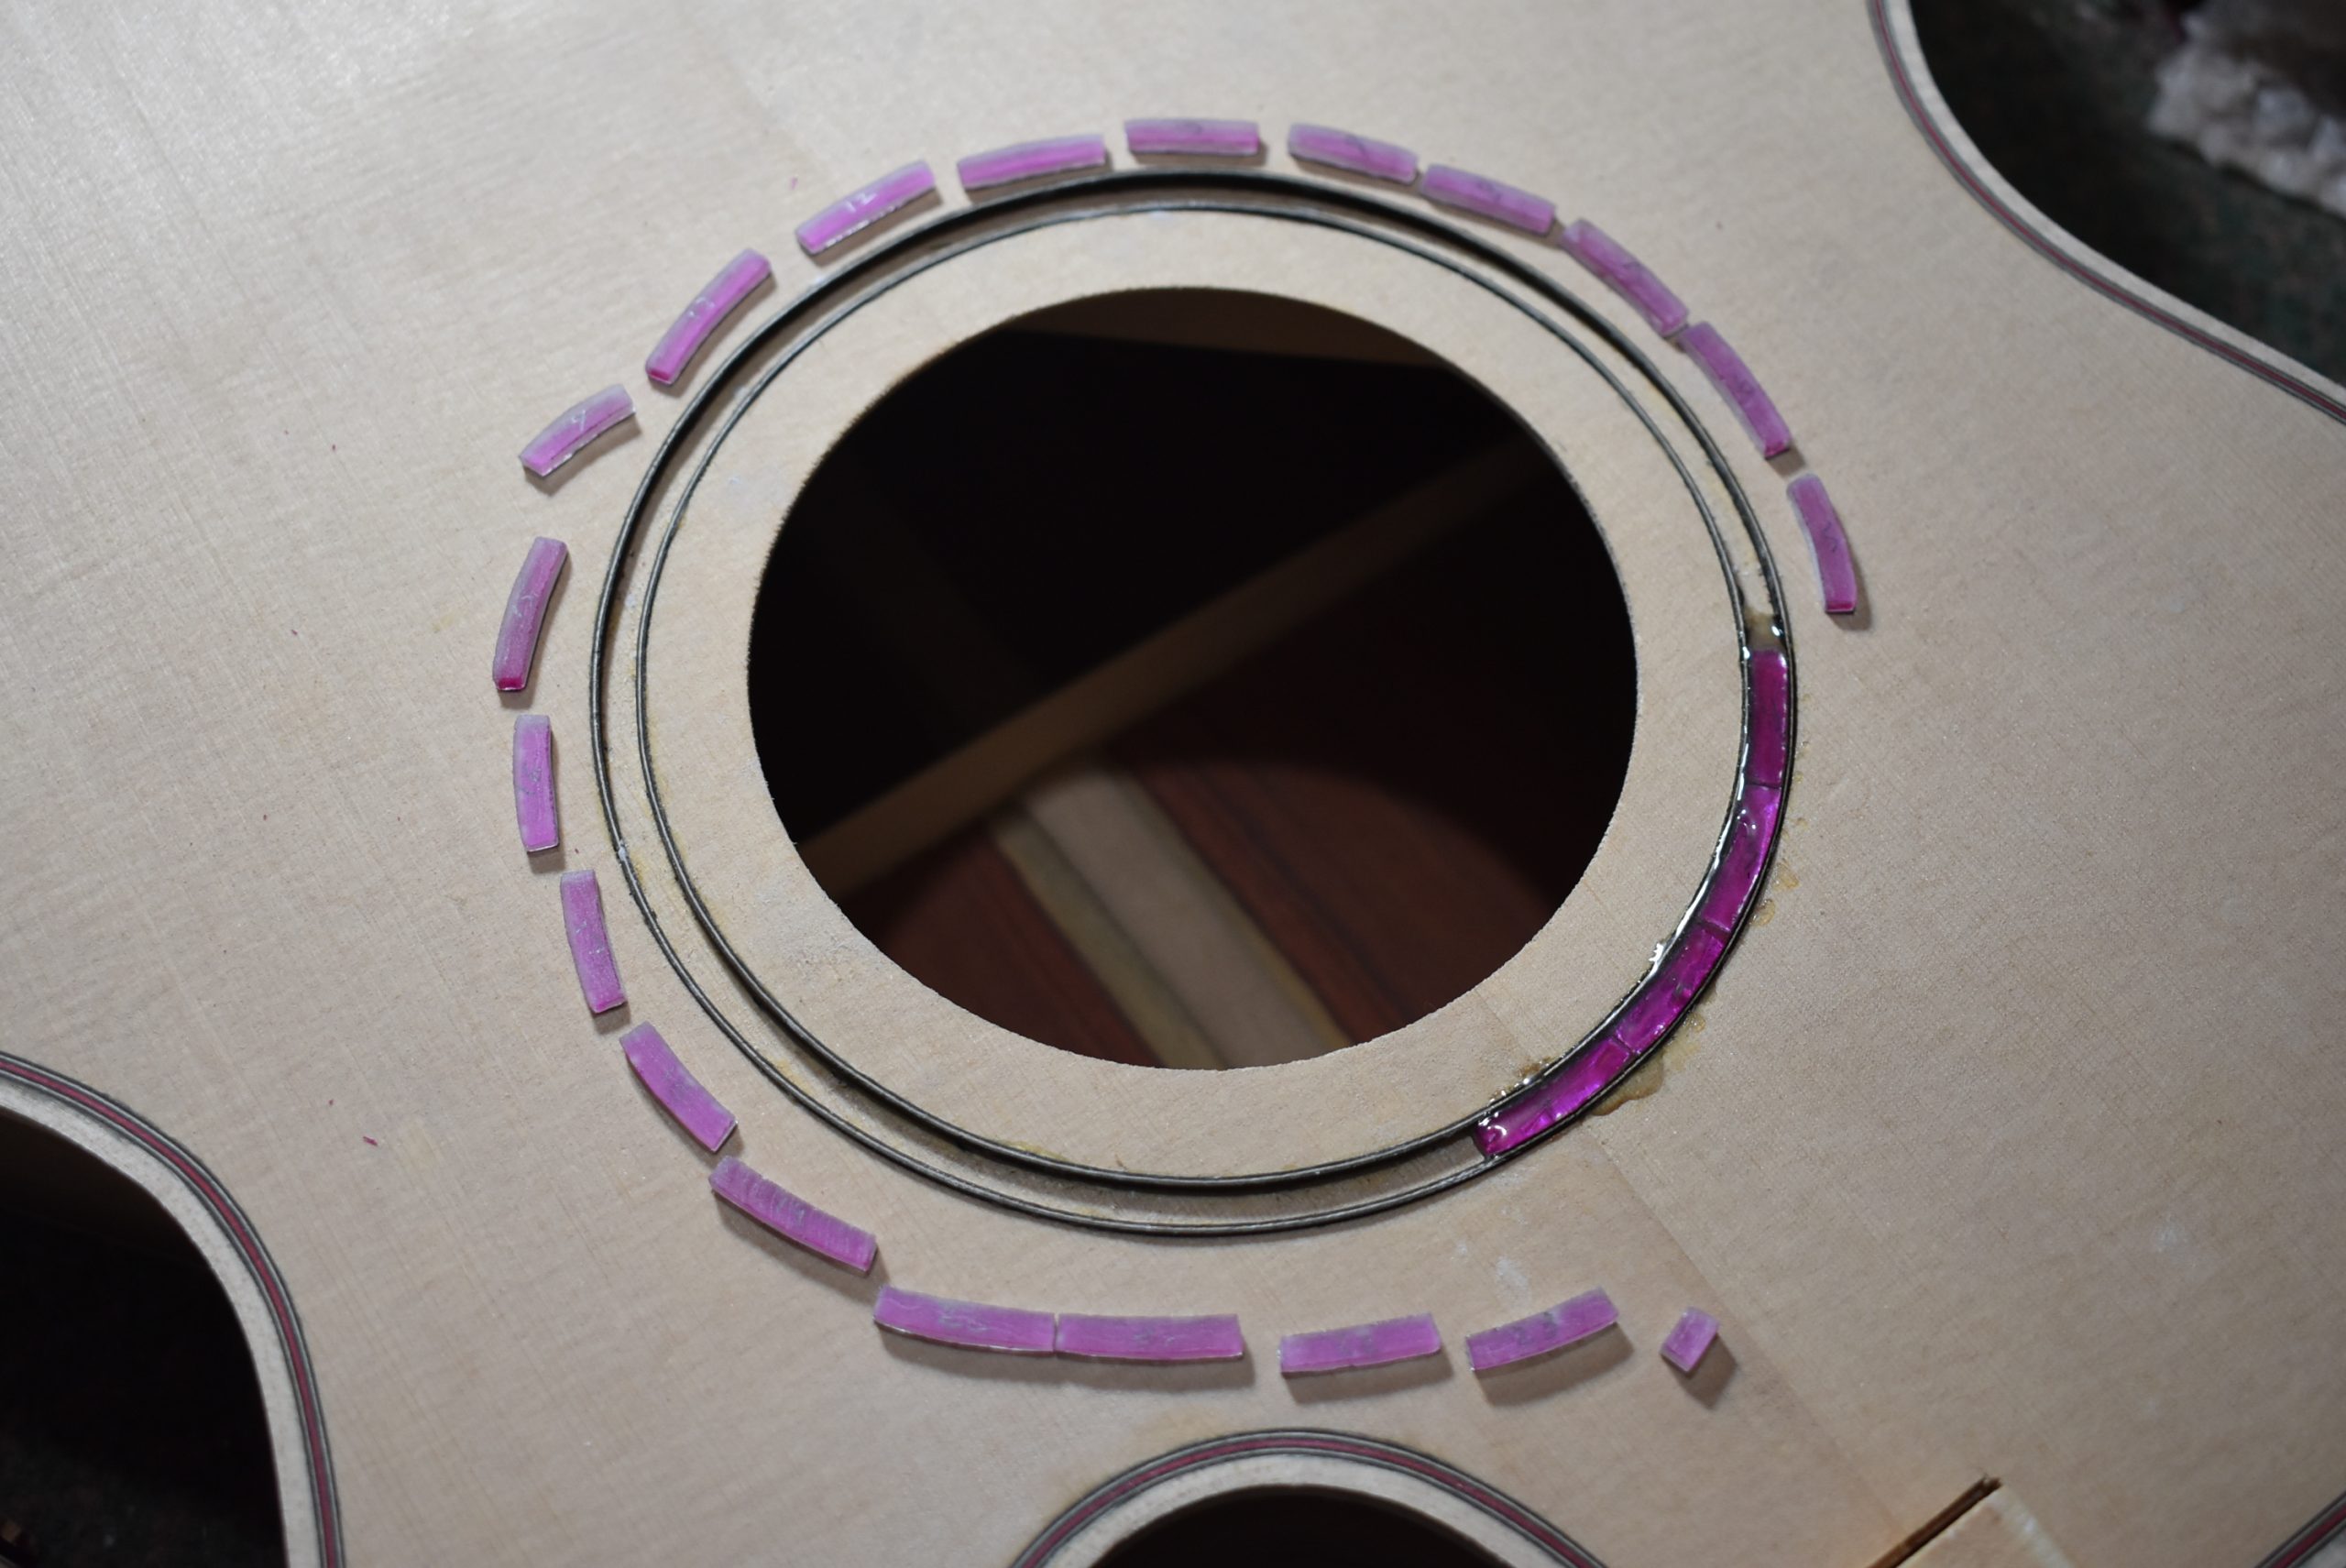
Here's the rosette. It's a simple ring of magenta glass. This glass is different from anything I have ever used. Magenta is apparently a difficult color to make chemically in glass. I had never seen a true fireweed color until I came across this glass in the Dick Blick catalog, but it turned out that the color was not in the glass at all. The magenta color is a coating adhered to clear glass, and there is a foil mirror on the back. This presented a problem. If I inlaid the glass as I normally do, I would grind off the coating, and all the color.
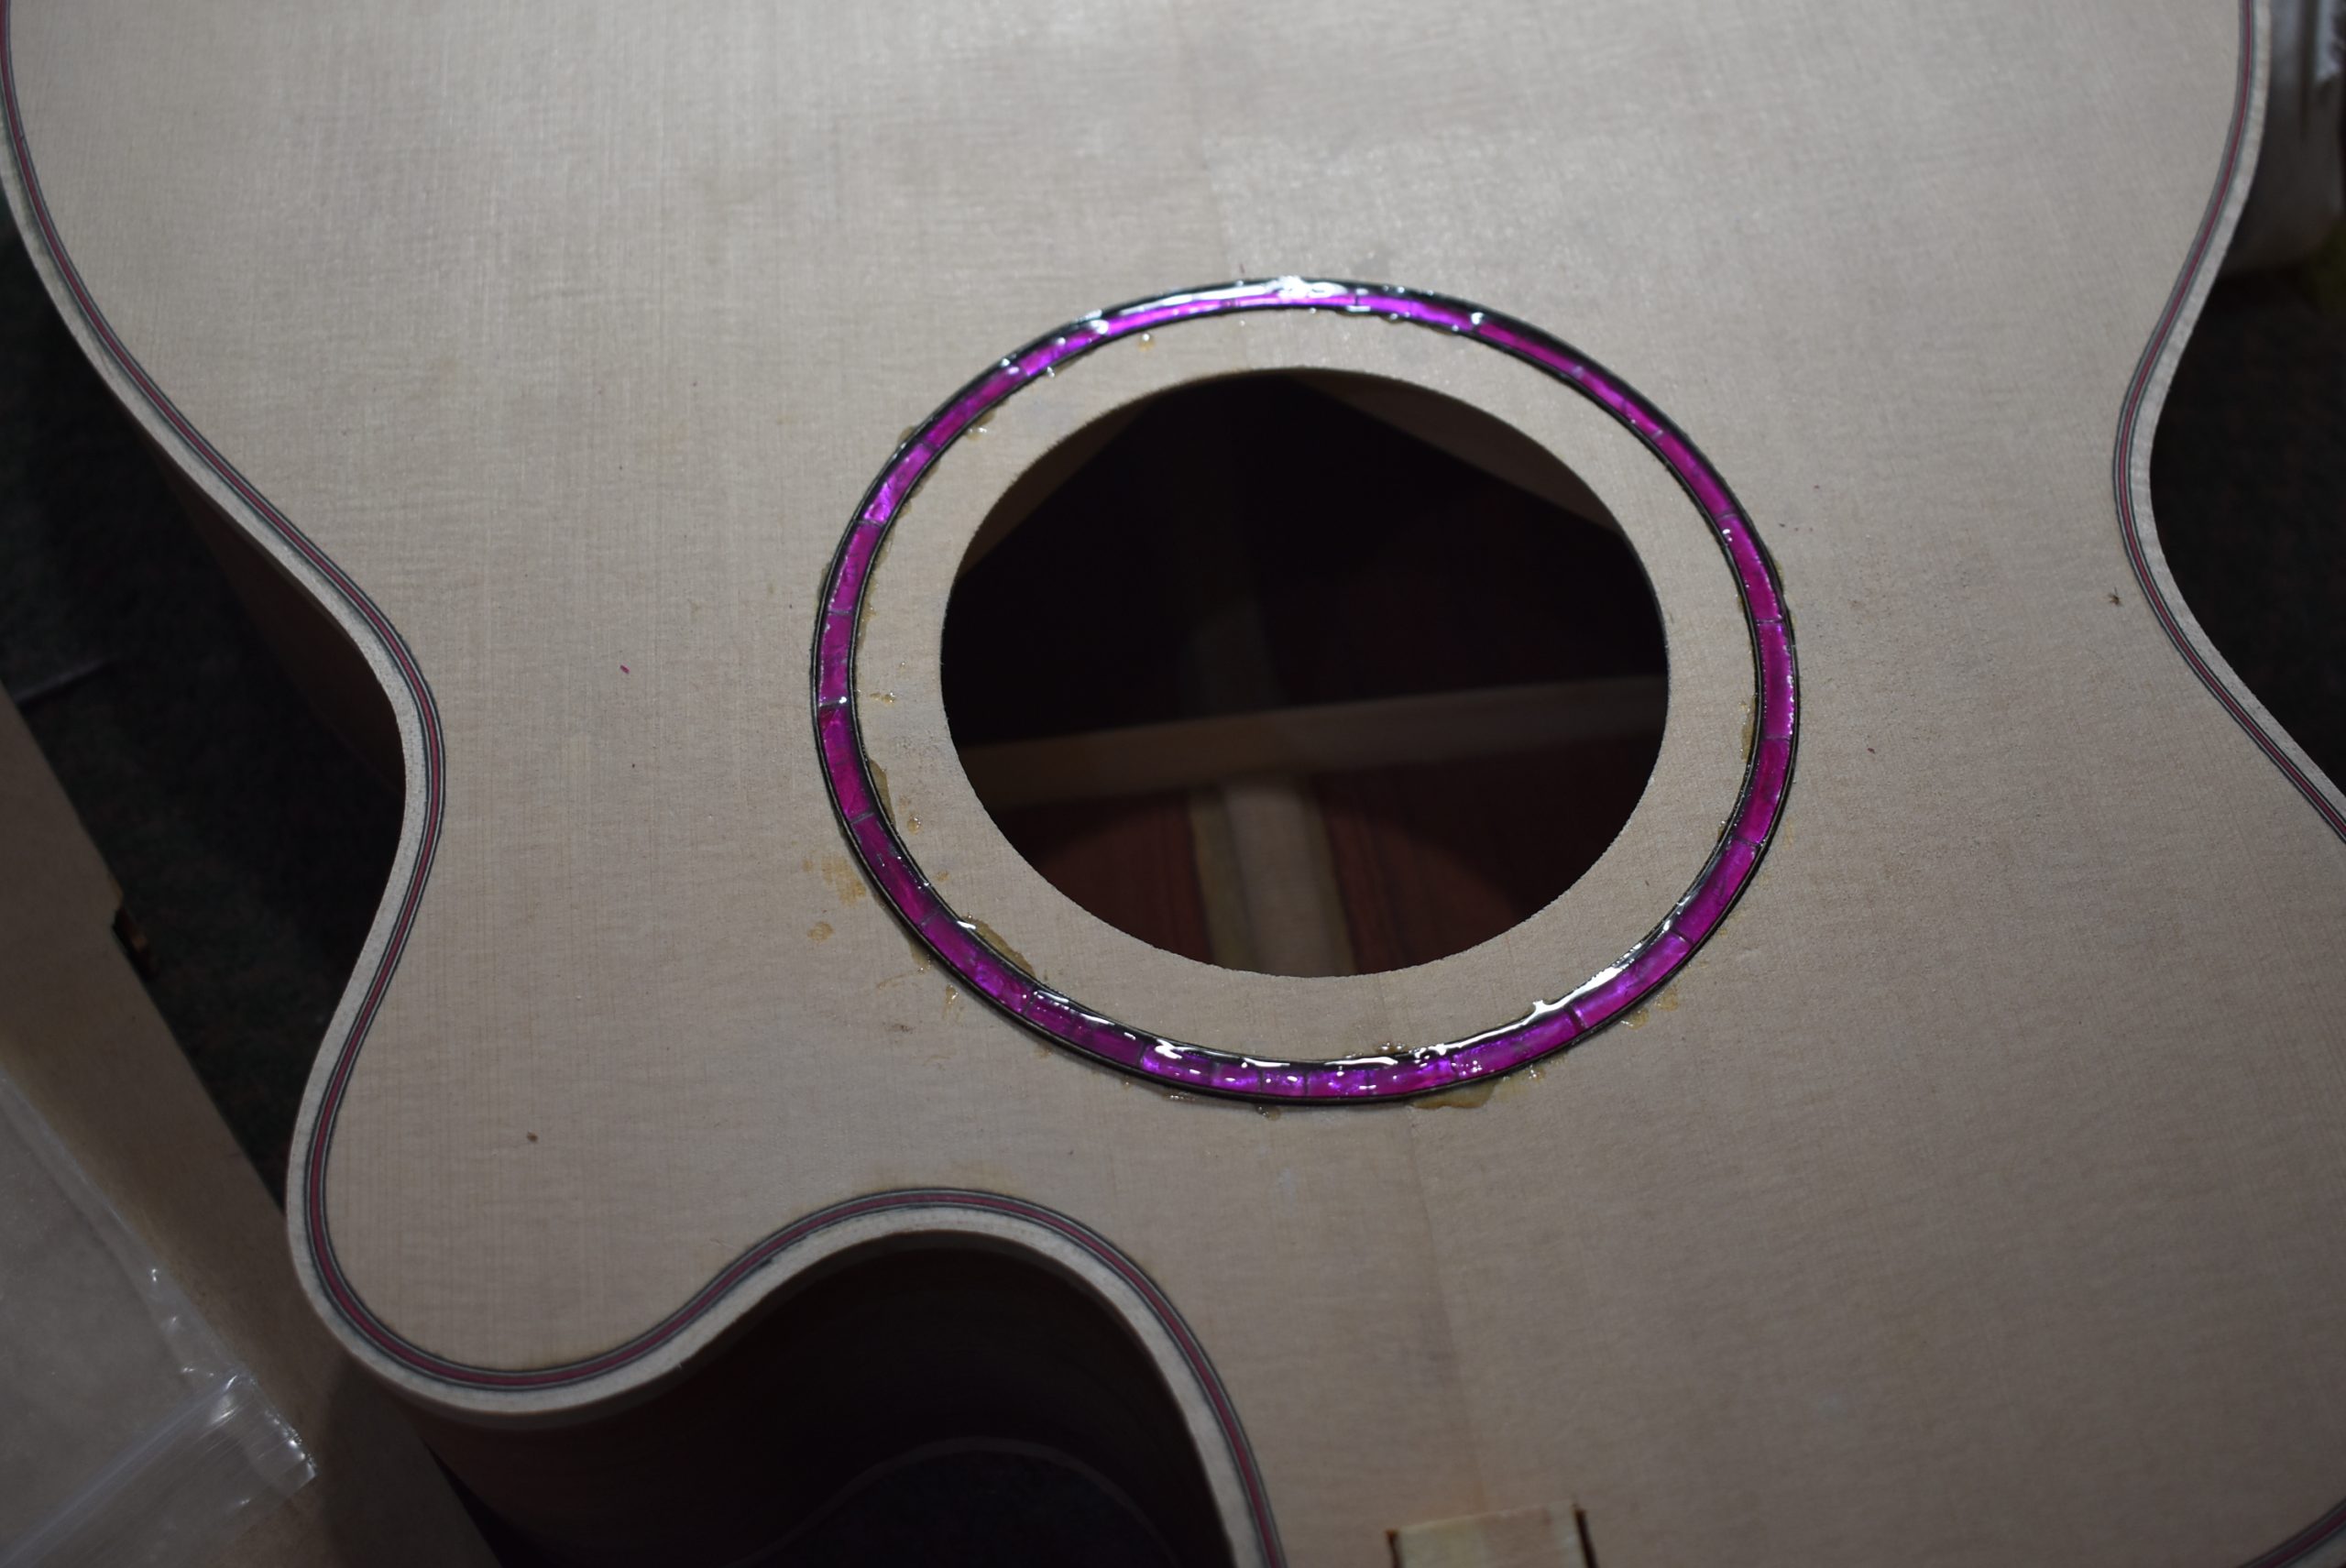
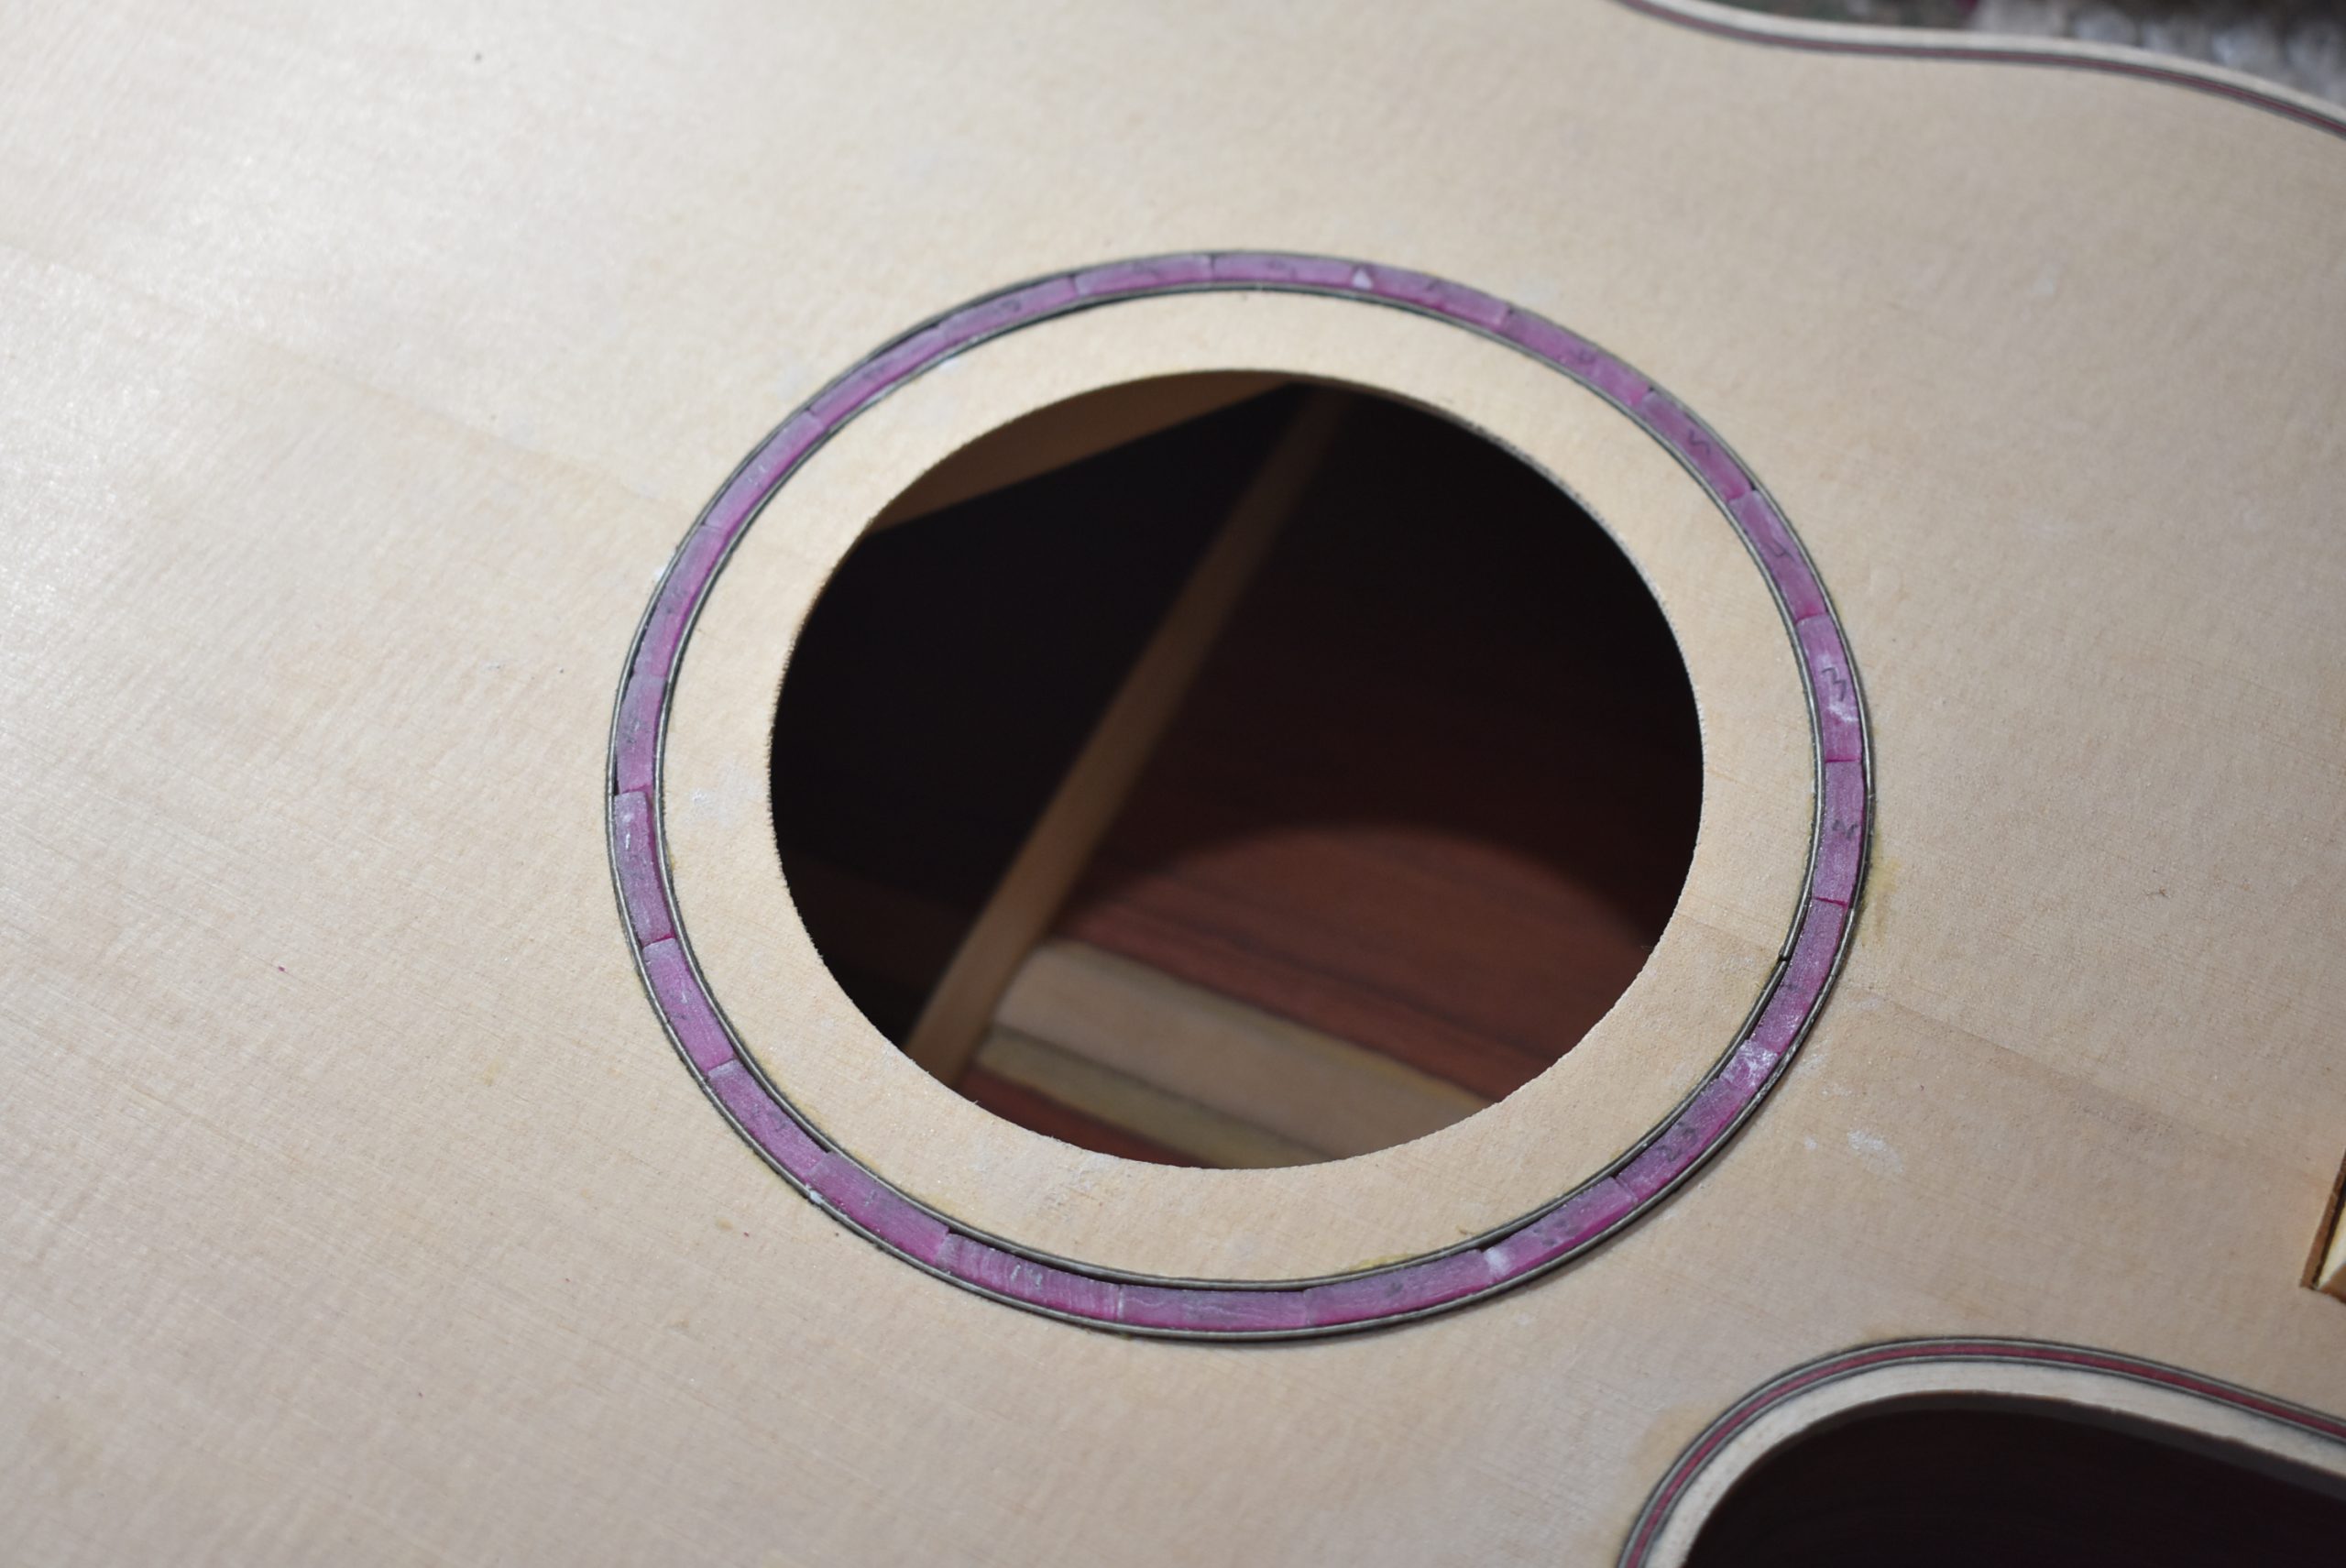 The solution was to grind off the foil backing, leaving clear glass with the magenta coating on one side. Then I glued aluminum foil onto the magenta coating. The foil was now the base, and any light hitting it would reflect back through the magenta layer. It was then a simple task to grind the clear glass down to about 2mm for inlay. In this photo all the pieces of the rosette have been ground to shape and dry fitted into the slot. The two black/white/black pieces of purfling had already been glued in.
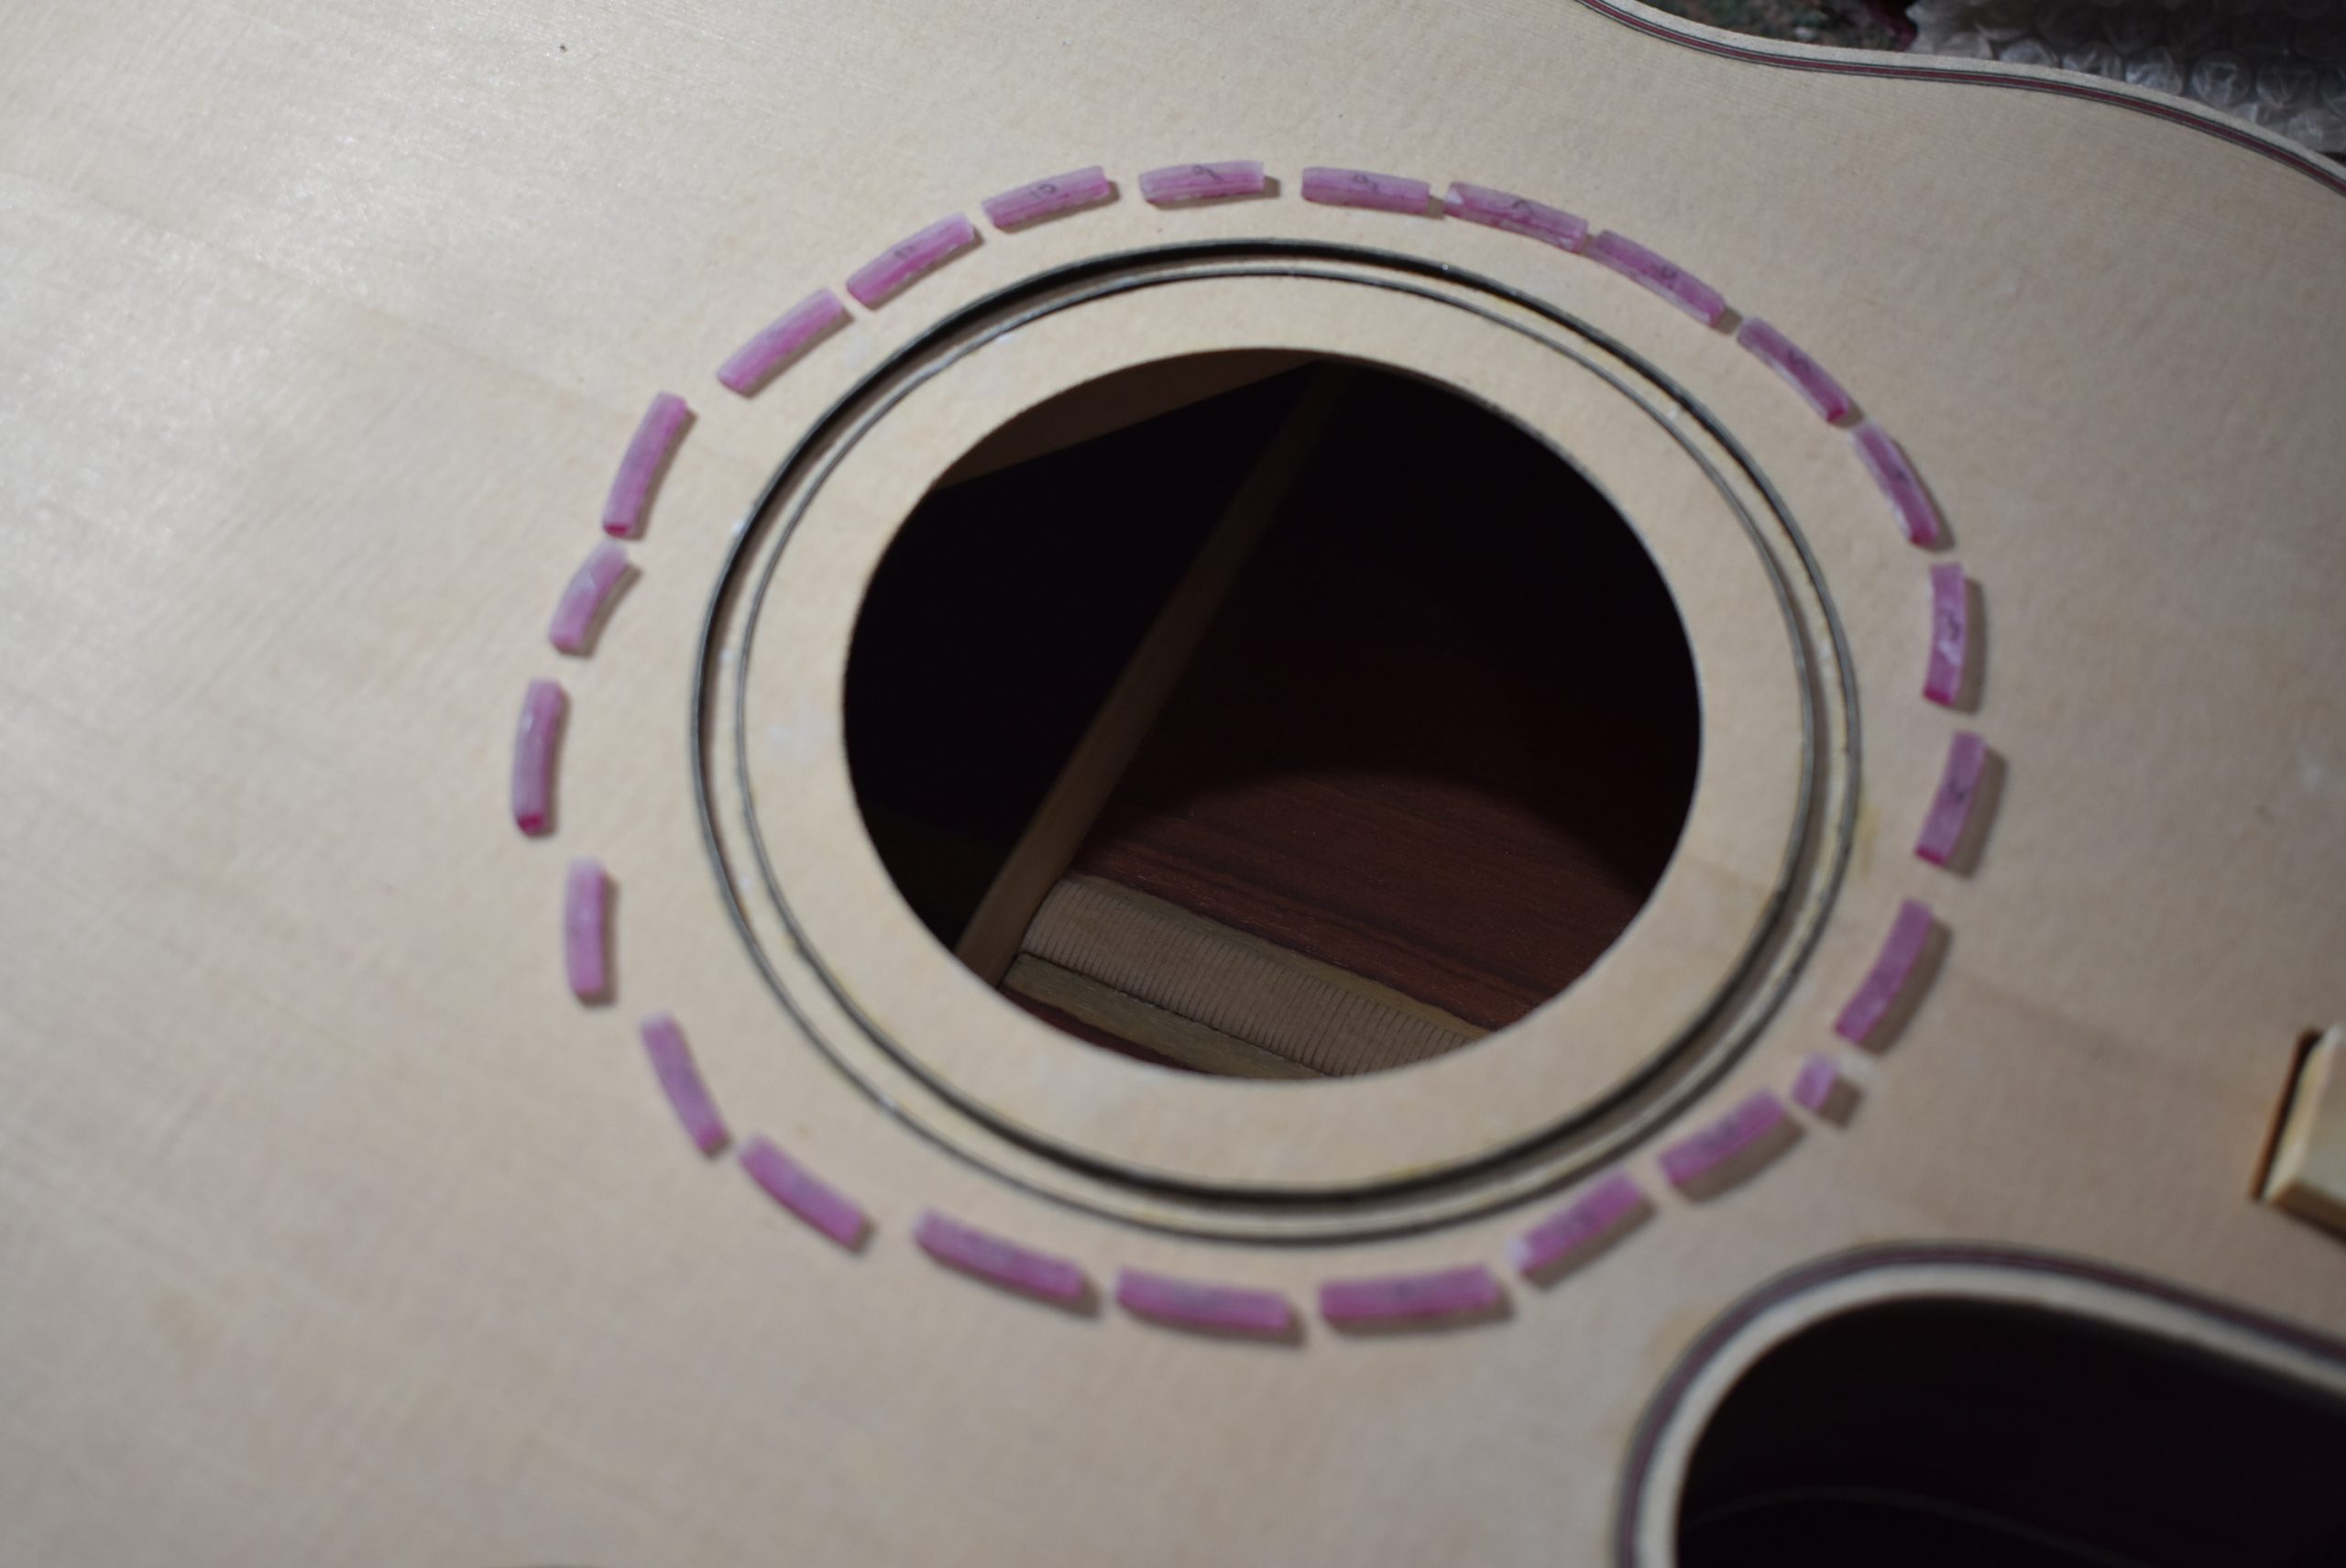
Now that I have determined that all the pieces fit, they have all been numbered and laid out for gluing.
Using clear epoxy, each piece is carefully fit to its neighbor. It works best to not lay out too much glue at a time.
All the pieces have now been glued in. After the epoxy is thoroughly dry, the inlay can be flattened with the diamond grinding blocks, and finally with very fine sandpaper. You must be very careful not to allow either the blocks or the sandpaper to dig into the spruce. Making a thin shield of metal or wood veneer can help protect the spruce. Always wear a respirator when working with glass. There is no cure for silicosis.
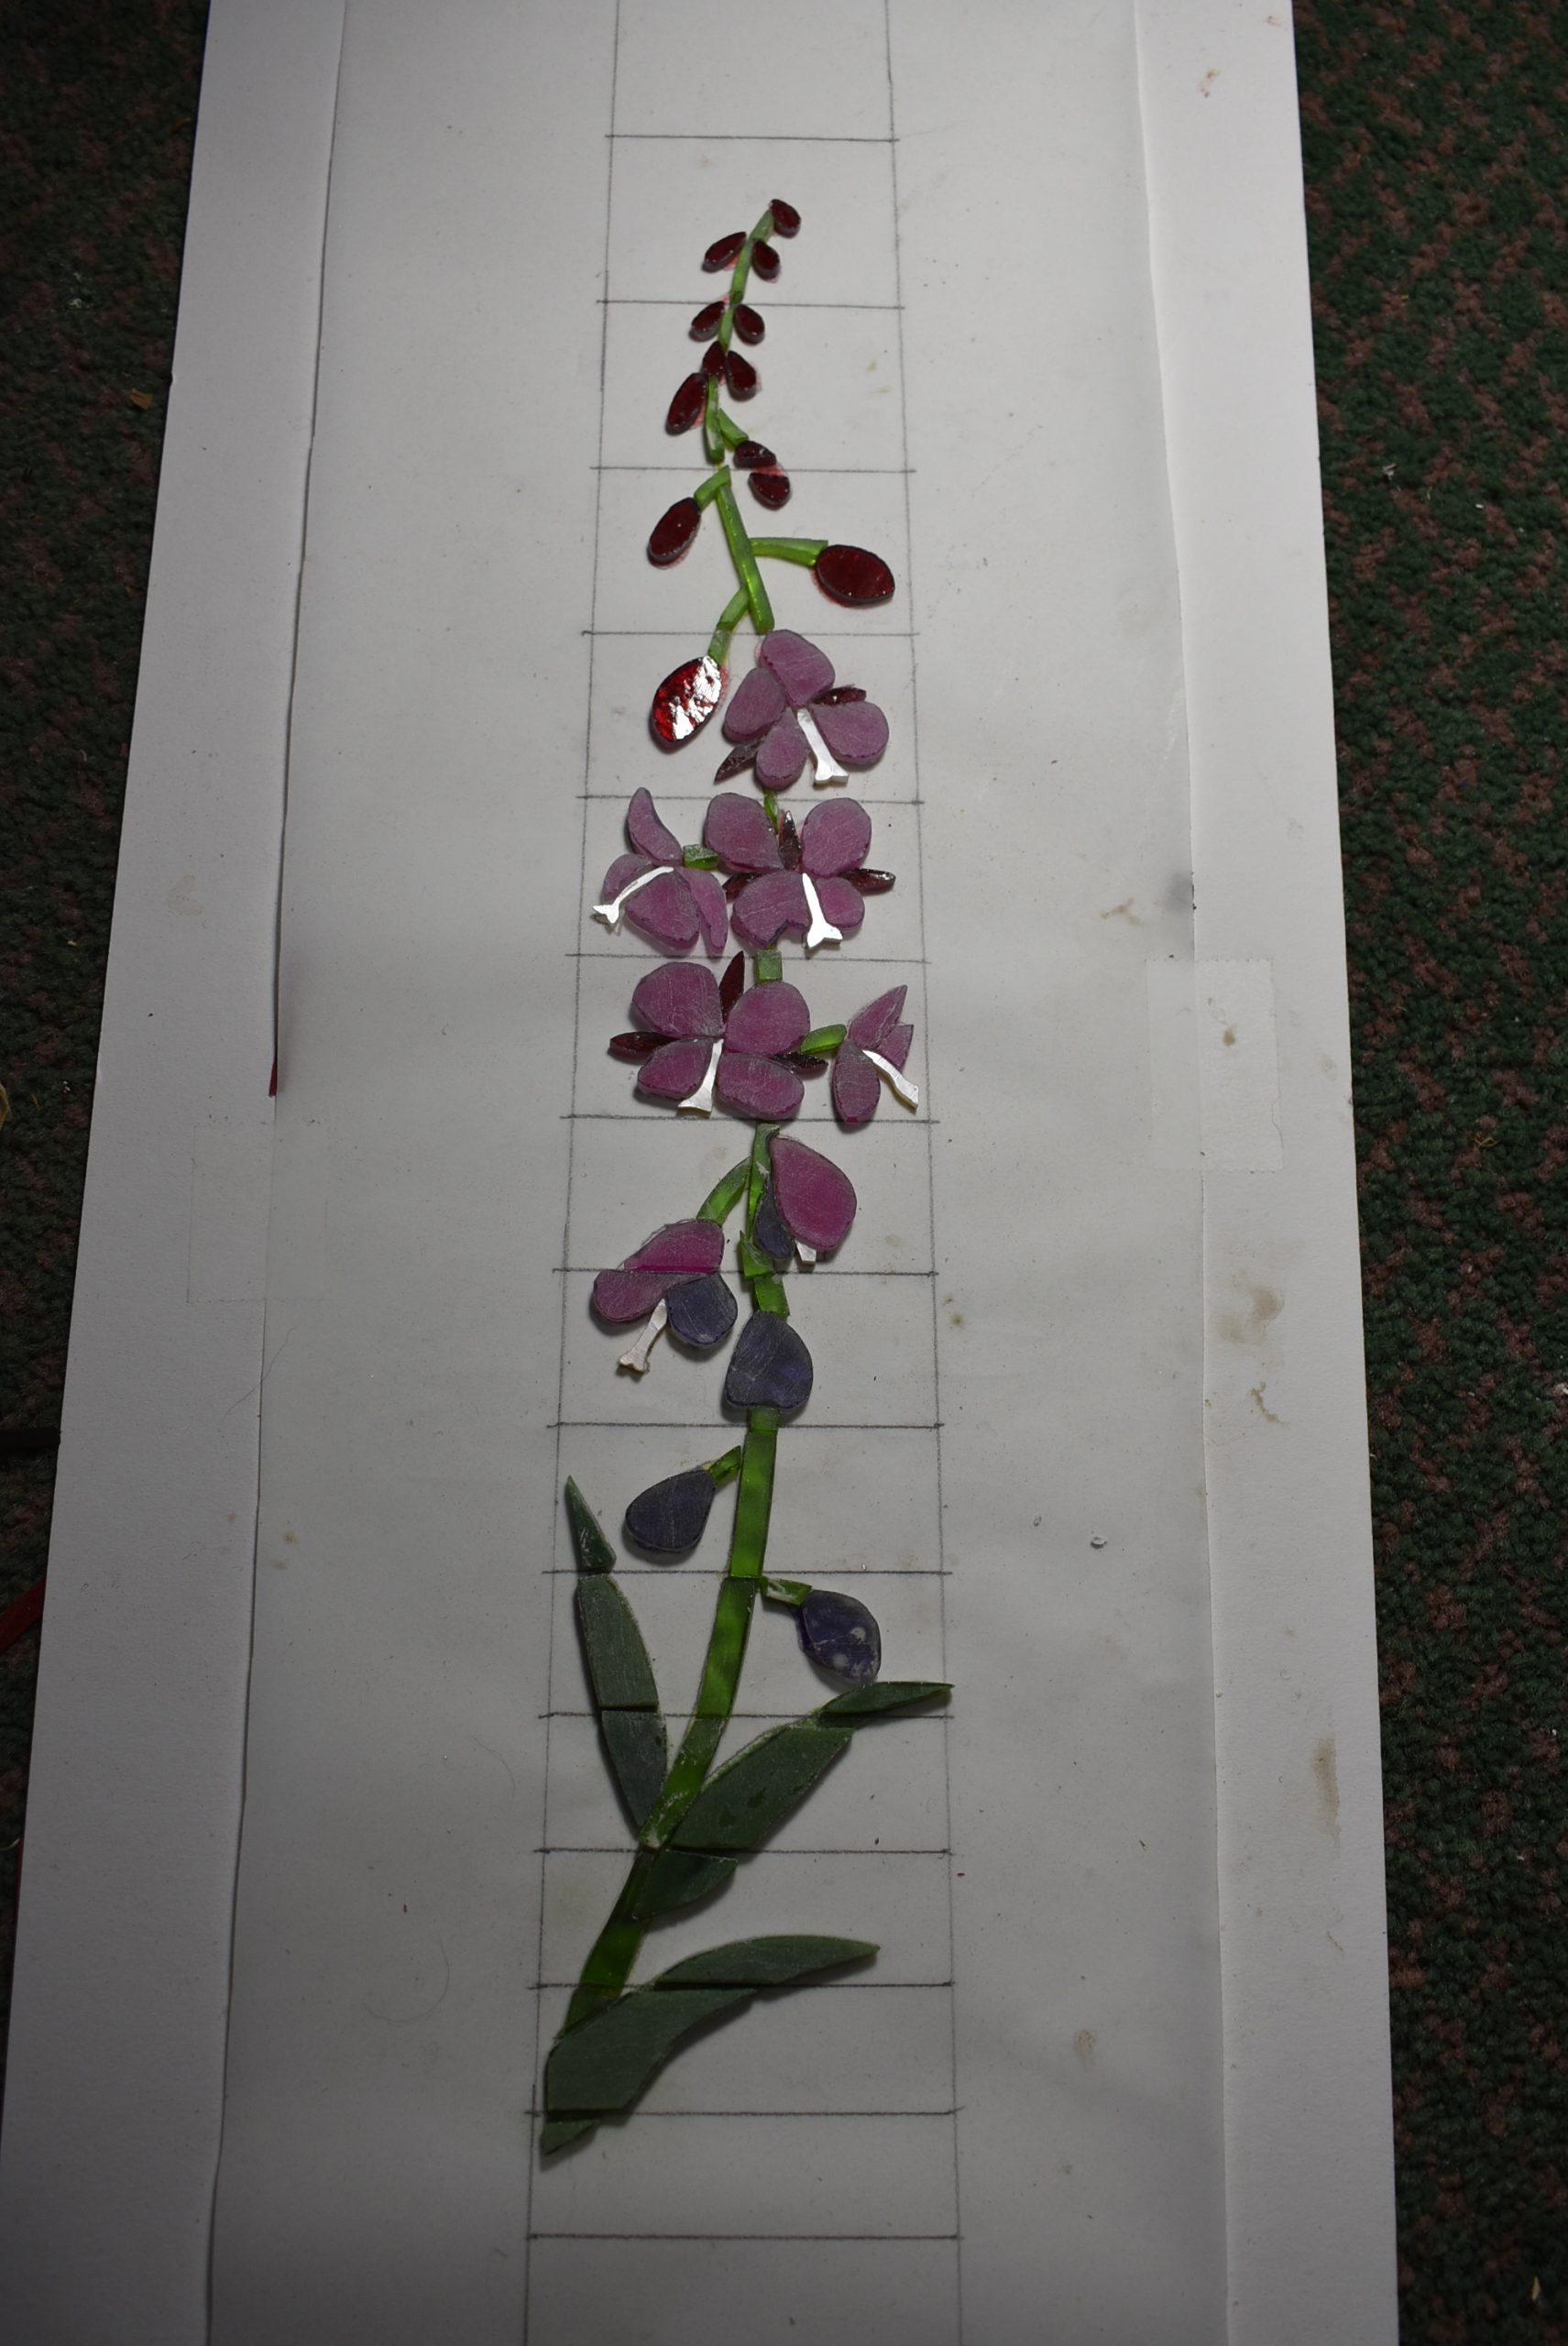
Here is the fingerboard inlay with all the pieces shaped and ready to inlay. To get to this point I first used a copy machine and made a duplicate of my pattern. From that duplicate I cut out each little paper piece with an x-acto knife and glued it onto the piece of glass. It helps to cut down the glass first to close to the size of the paper so there isn't so much glass to grind away. This inlay is entirely glass, except for the flower stamens, which are mother of pearl.
All the pieces are then laid out on the fingerboard. Care must be taken to leave about 1mm of ebony on each side of the fret slots for the fret tang. If the glass is up to the edge of the slot, the bumps on the fret tang will shatter the glass. Each space between the slots has its own collection of pieces, like a little jigsaw puzzle. Each little puzzle is tacked together with tiny drops of super glue. This makes it much easier to align all the pieces on the fingerboard. The pieces are then outlined in pencil, transferring the design to the ebony.
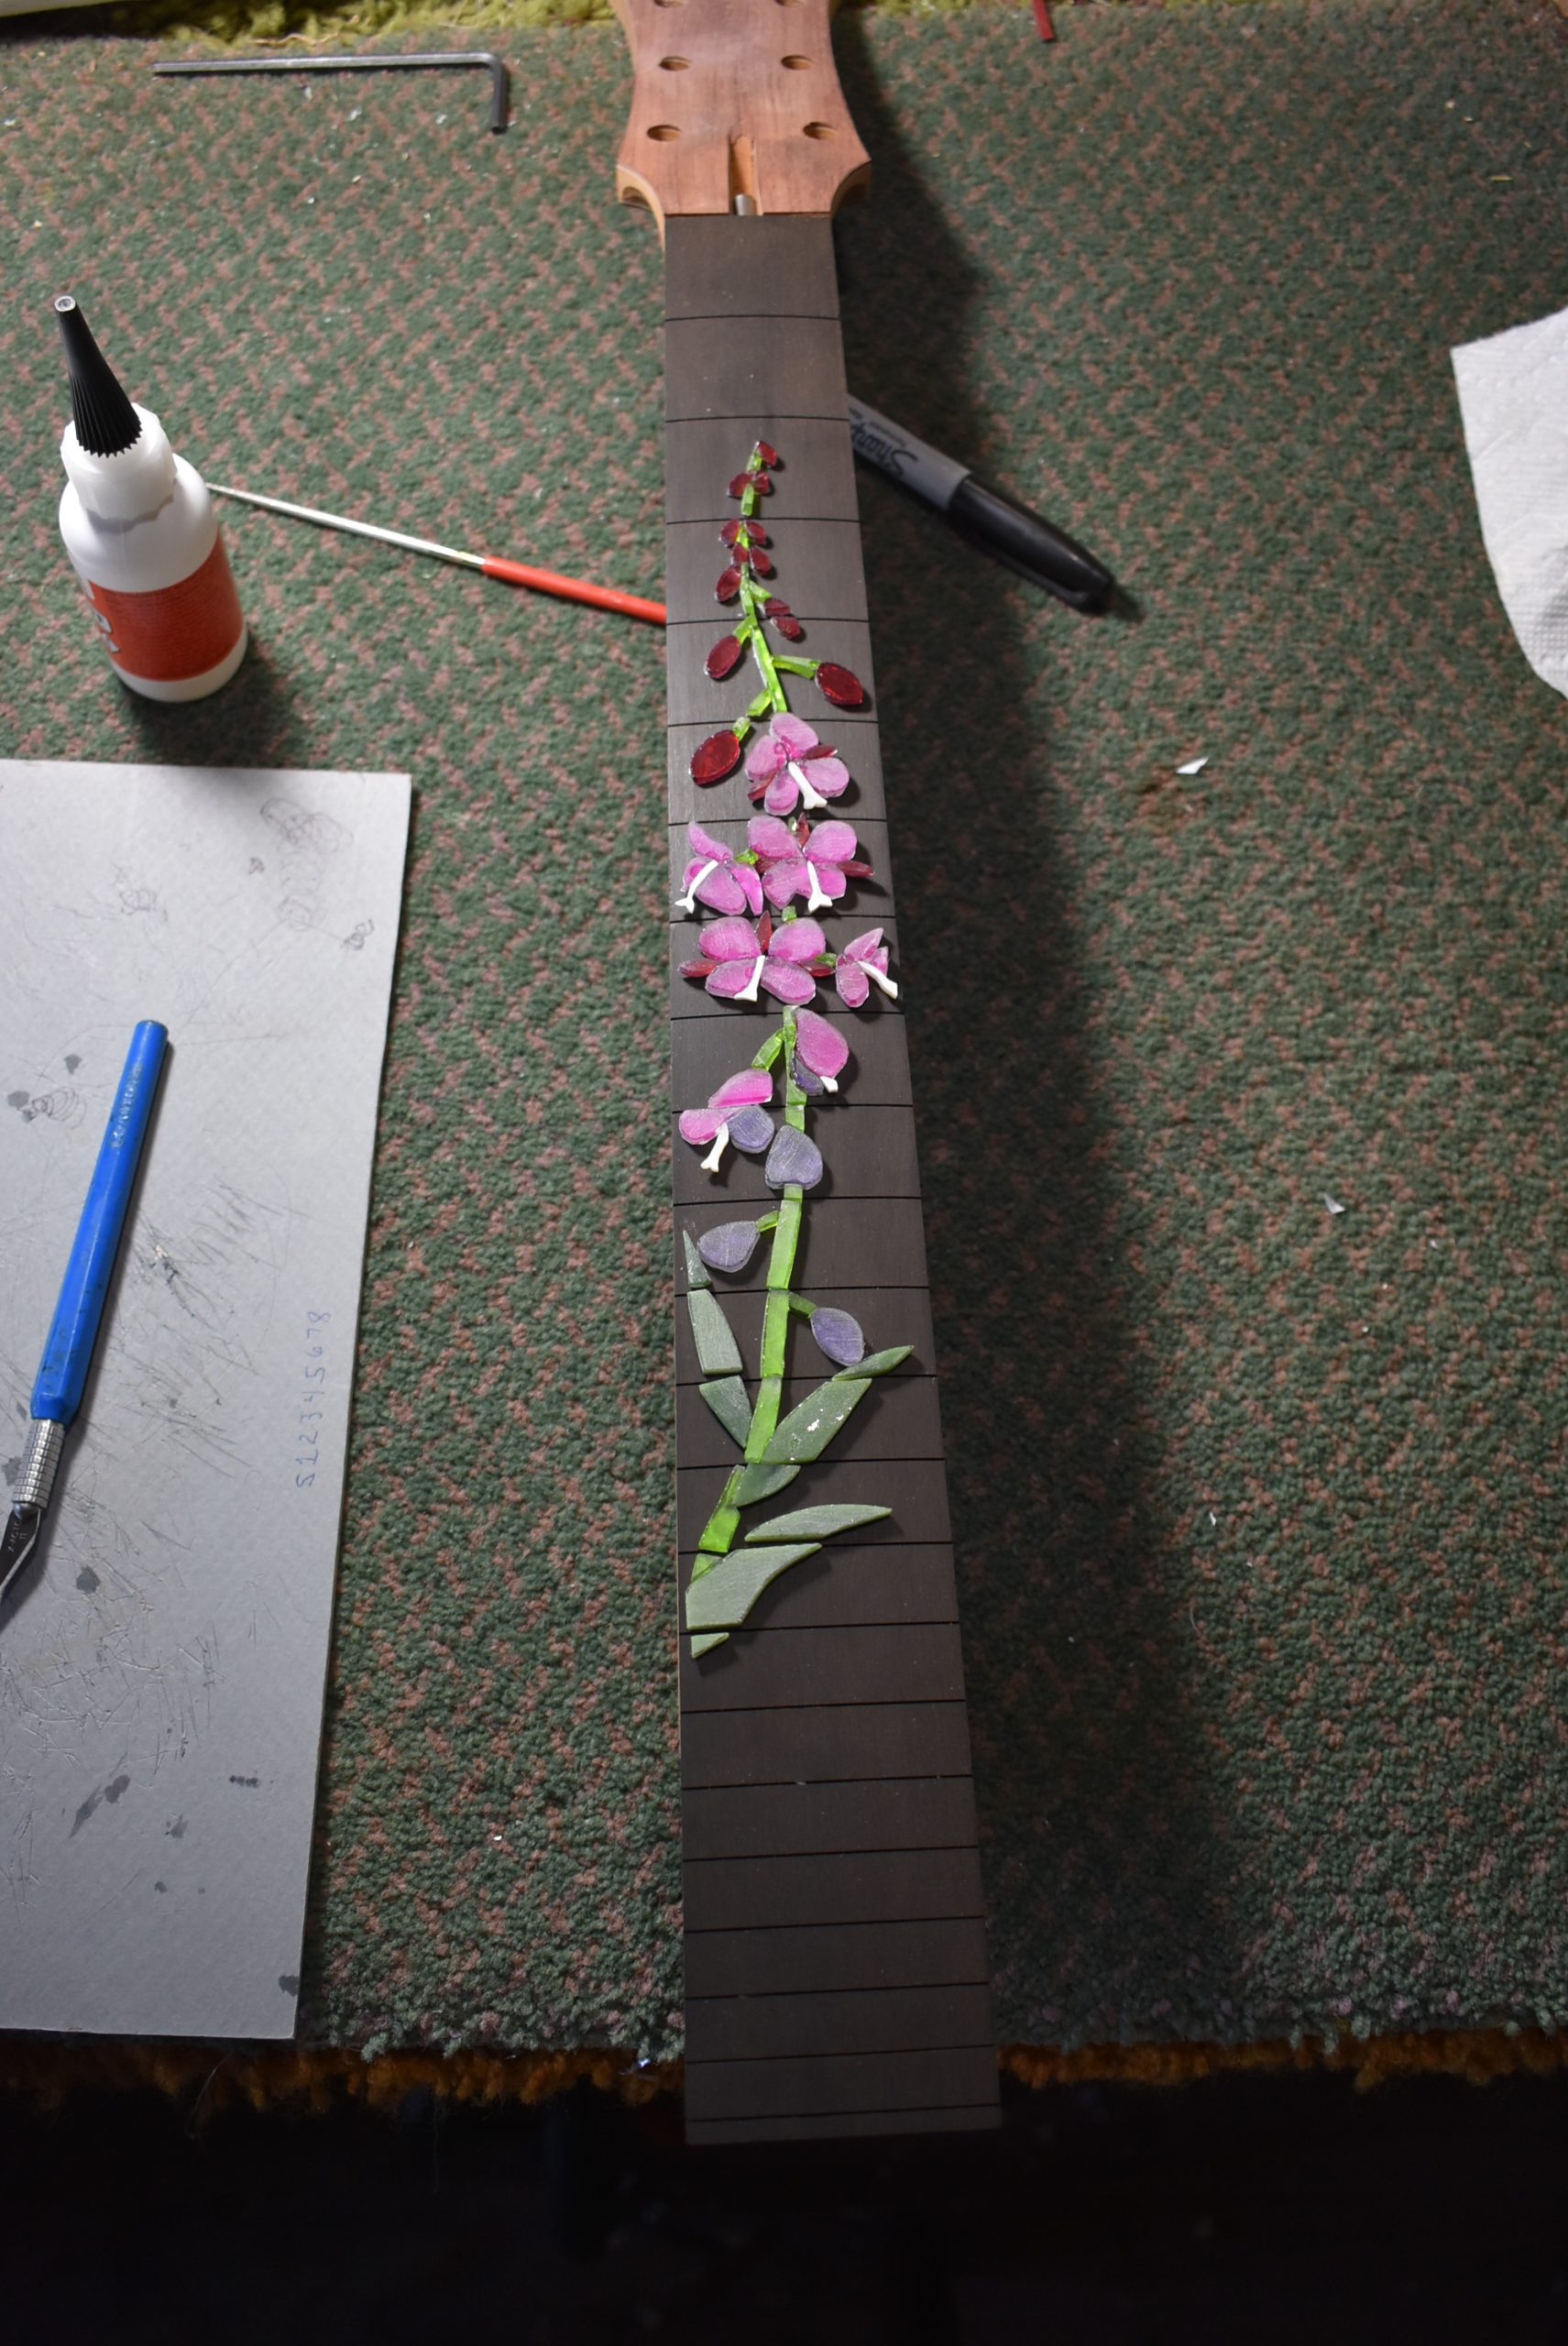
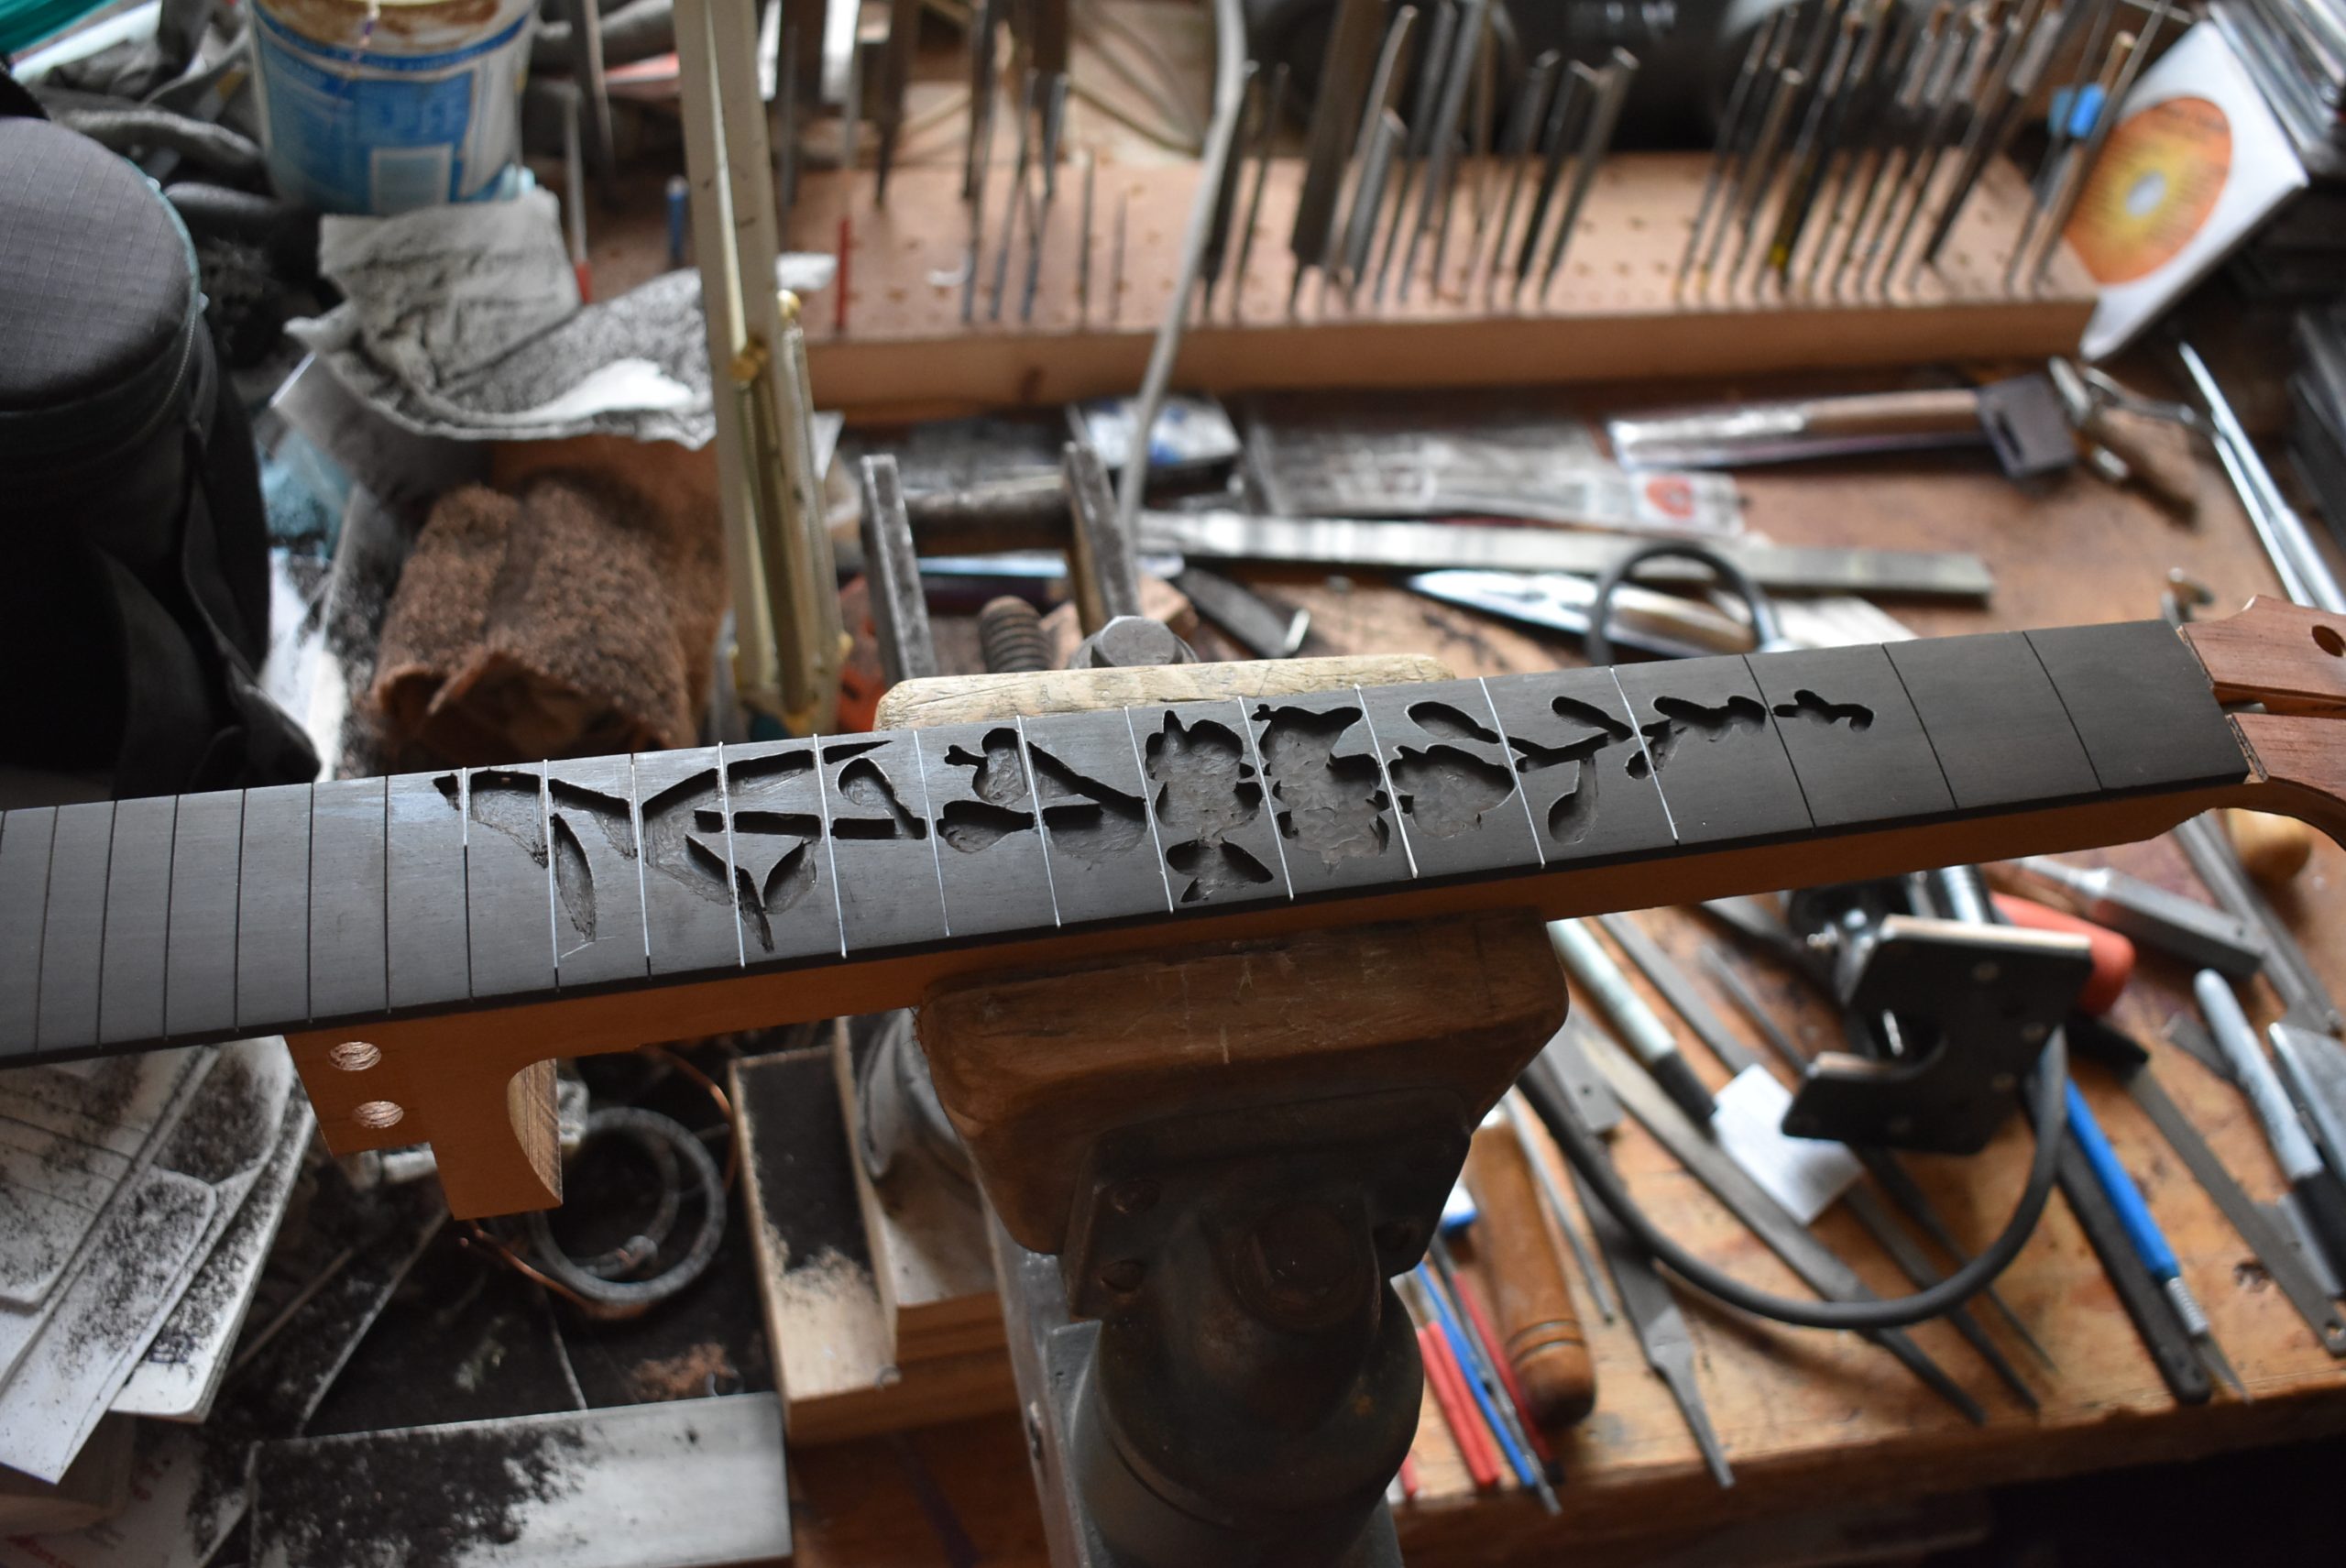 Before the routing of ebony can happen, the fret slots have to be filled to prevent the edges from collapsing when the router bit gets close to them. I use teflon that has the same thickness as the fret slot. The teflon comes in a sheet. I cut it into strips, press it into the slots, and then use a knife or chisel to carve it down to match the radius of the fingerboard. Following inside the pencil lines, I use a small Bosch router and a Dremel tool with small carbide bits to remove most of the ebony. Acute corners are excavated with an x-acto knife and small chisels.
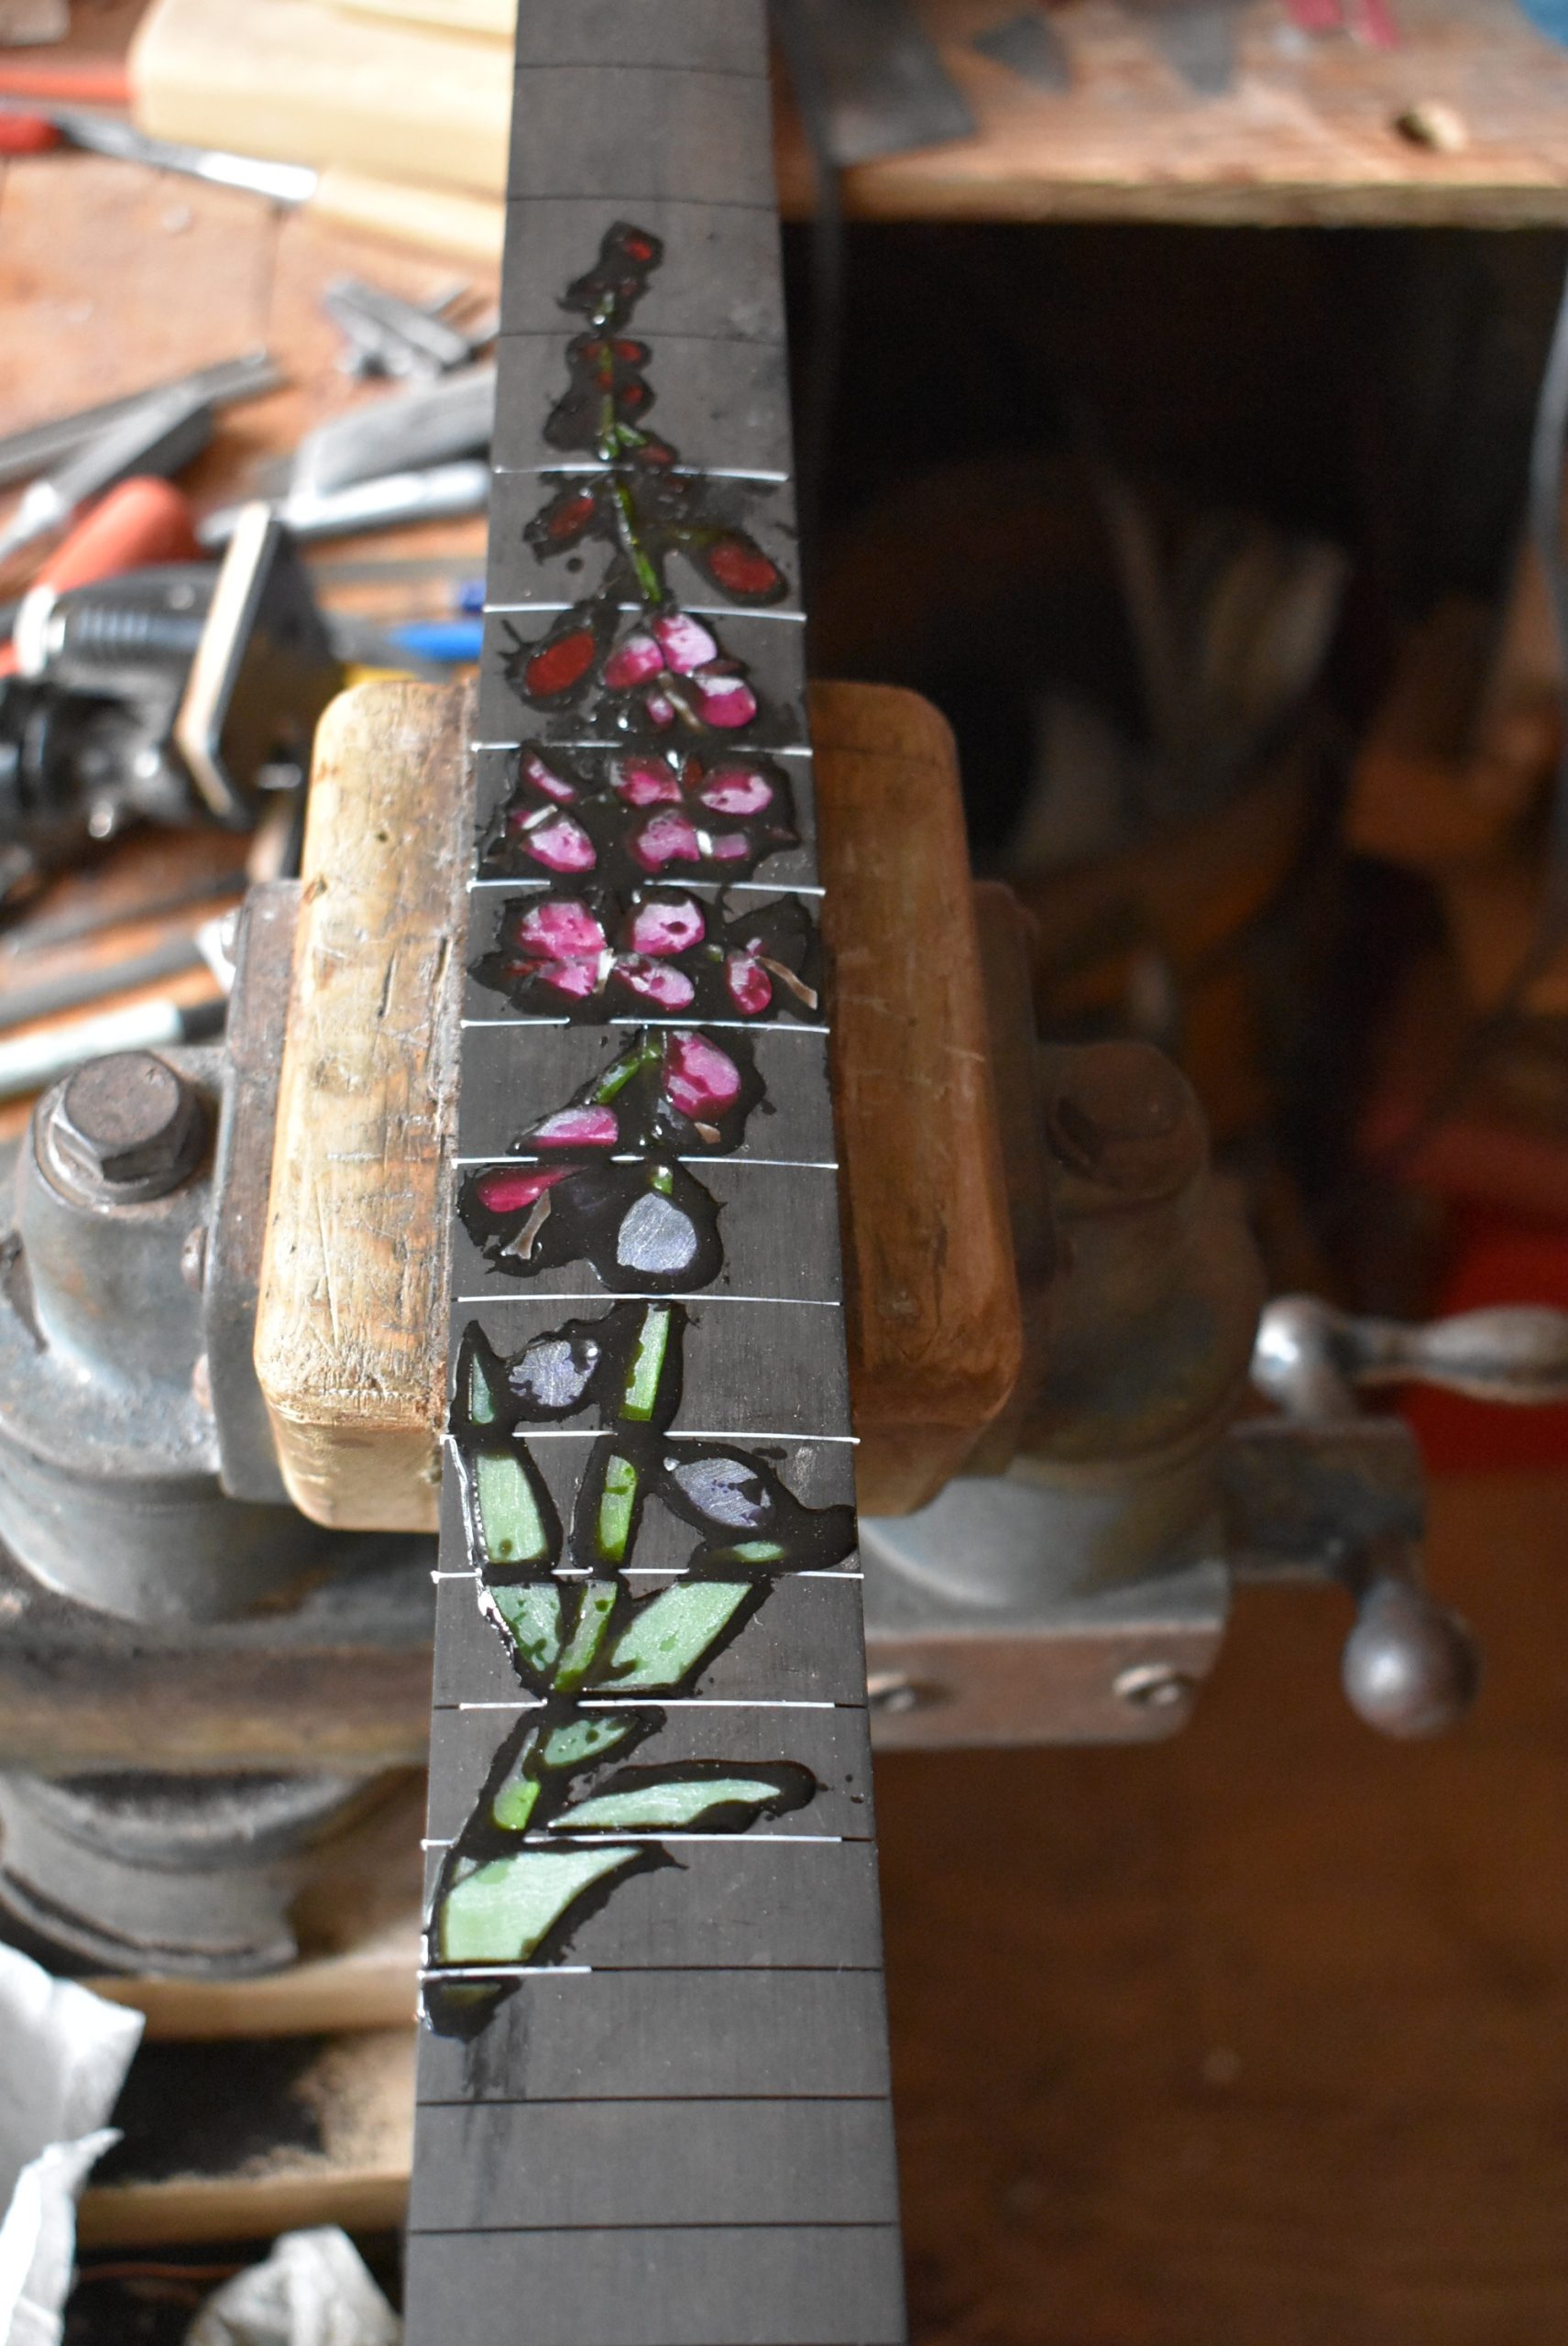
The inlay is glued in with epoxy mixed with ebony dust.

Flattening the glass takes a while, even with the diamond grinding blocks. I work through the four grits of the blocks, then go to 600 paper, and on up to 2000.
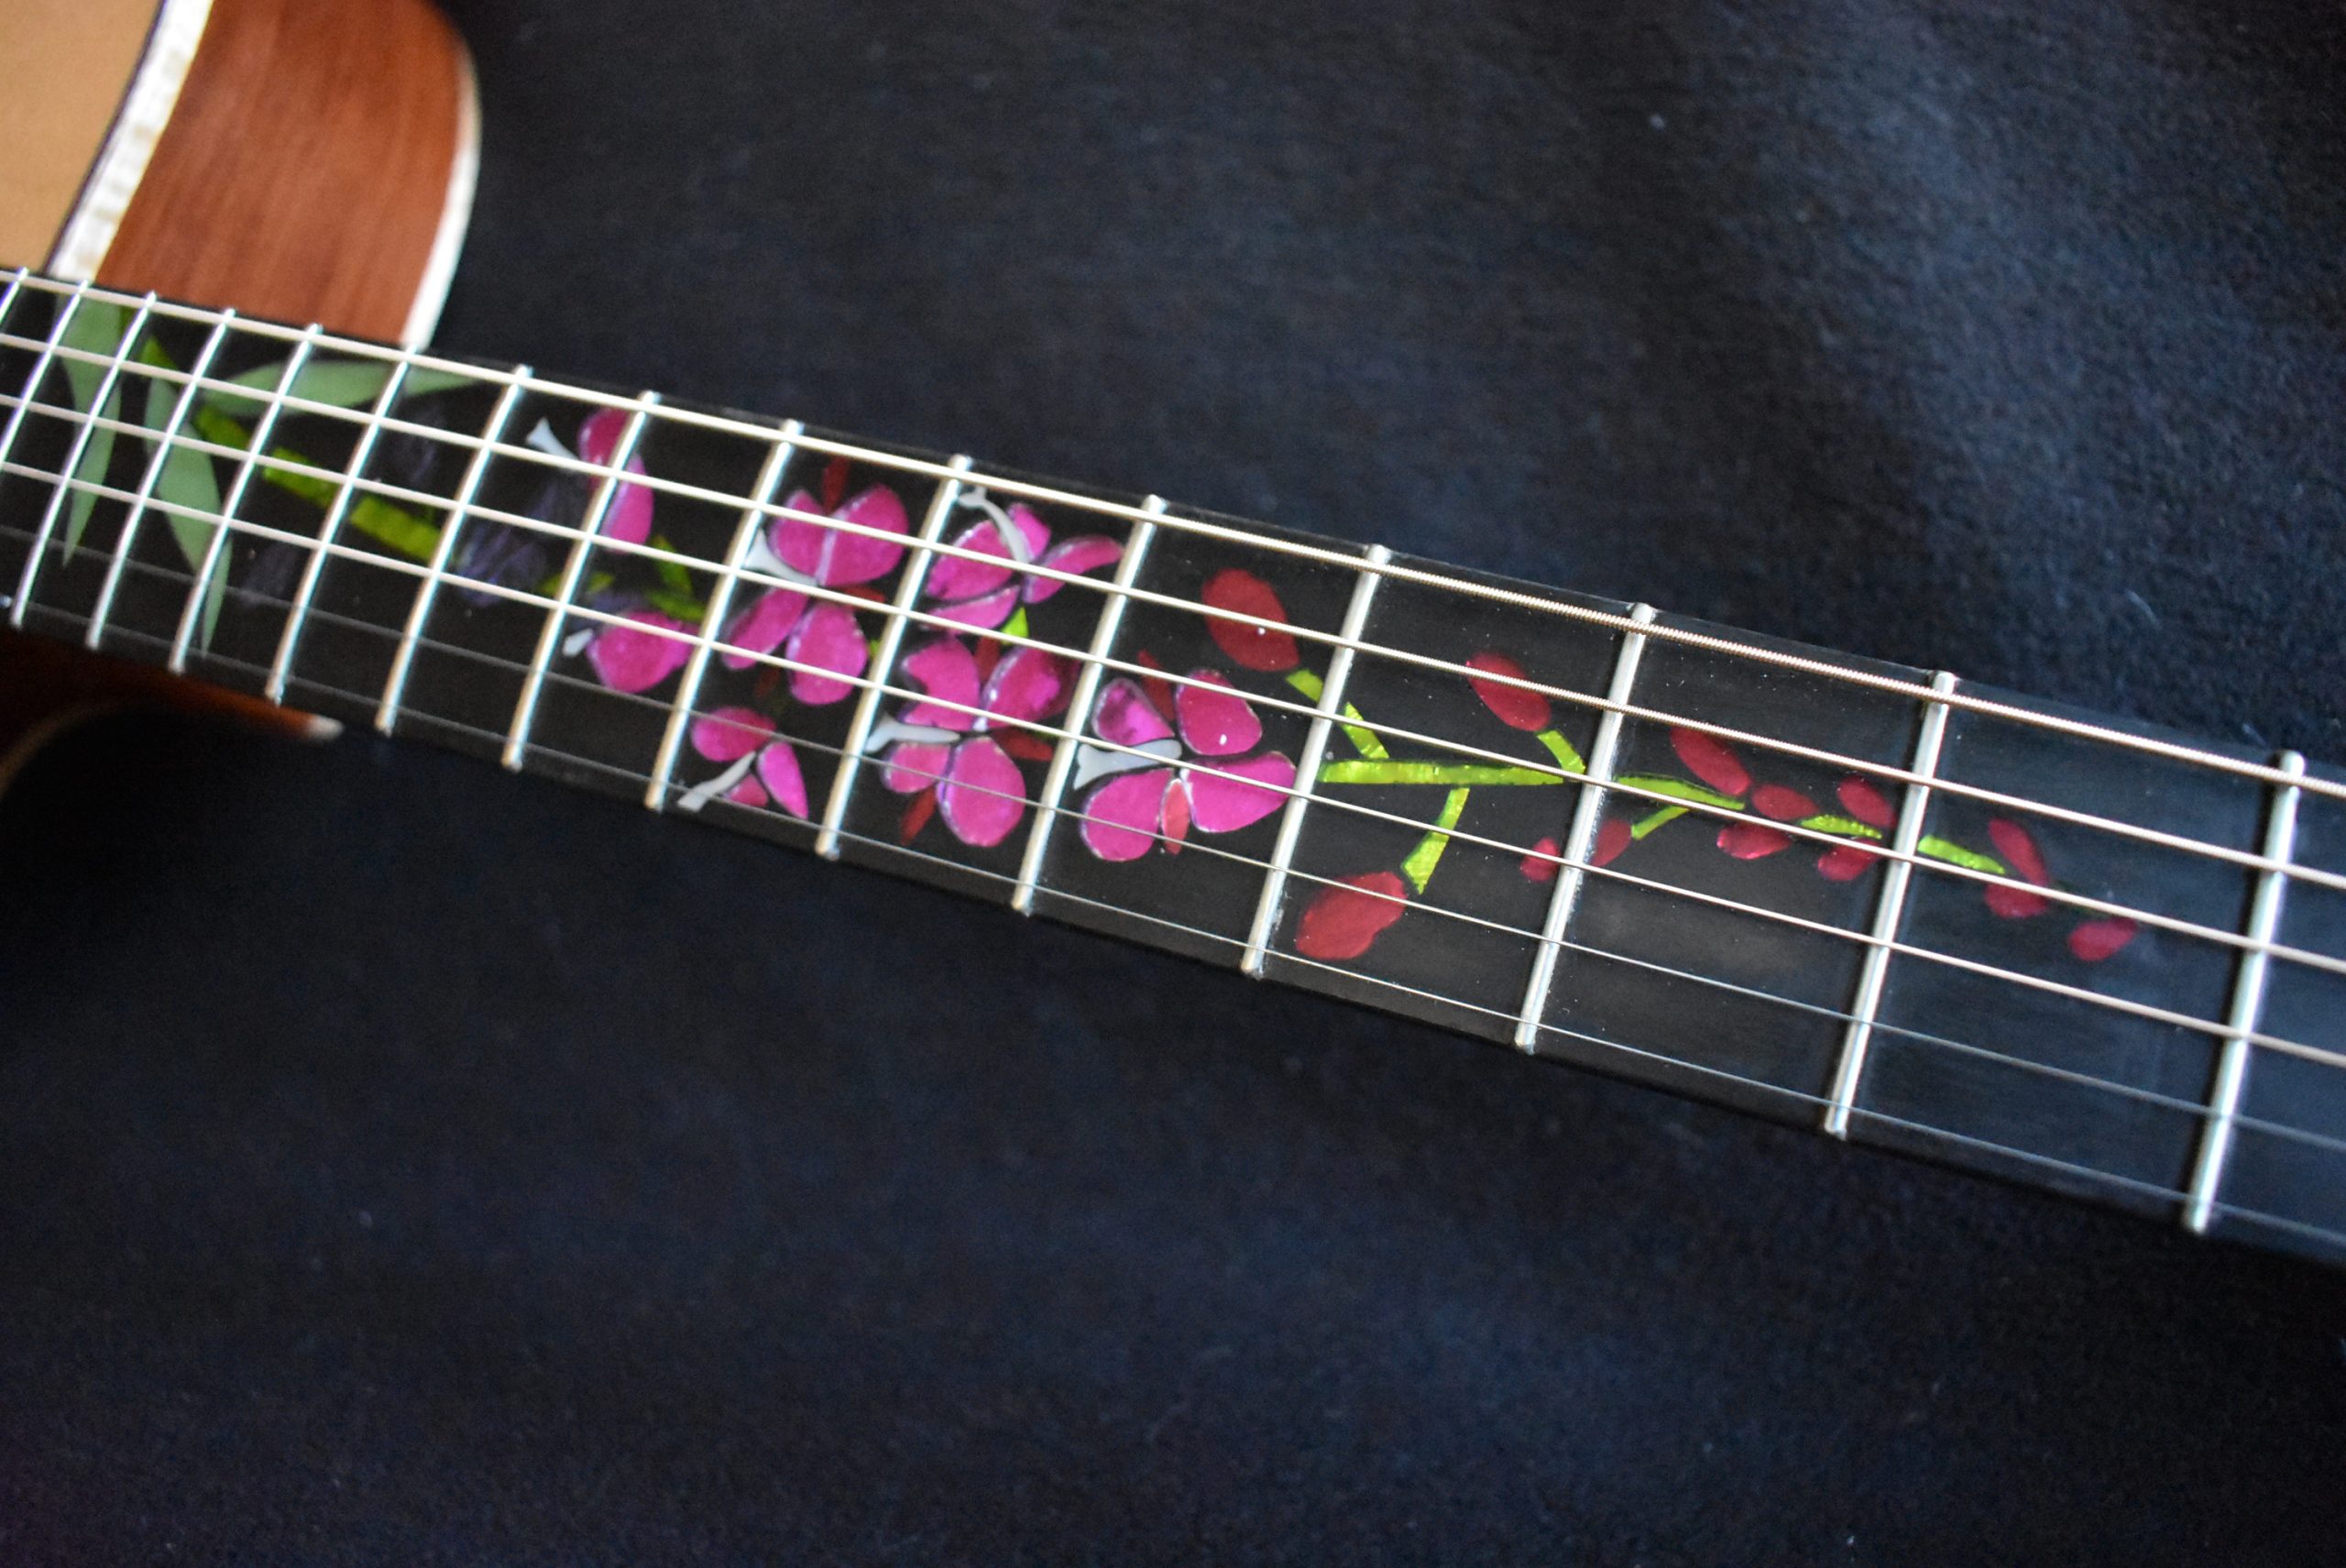
Here is the finished inlay. The final step, after the frets are in and dressed, is to put coconut oil on the fingerboard. This darkens the ebony and really makes the inlay shine.