Robin - Archtop
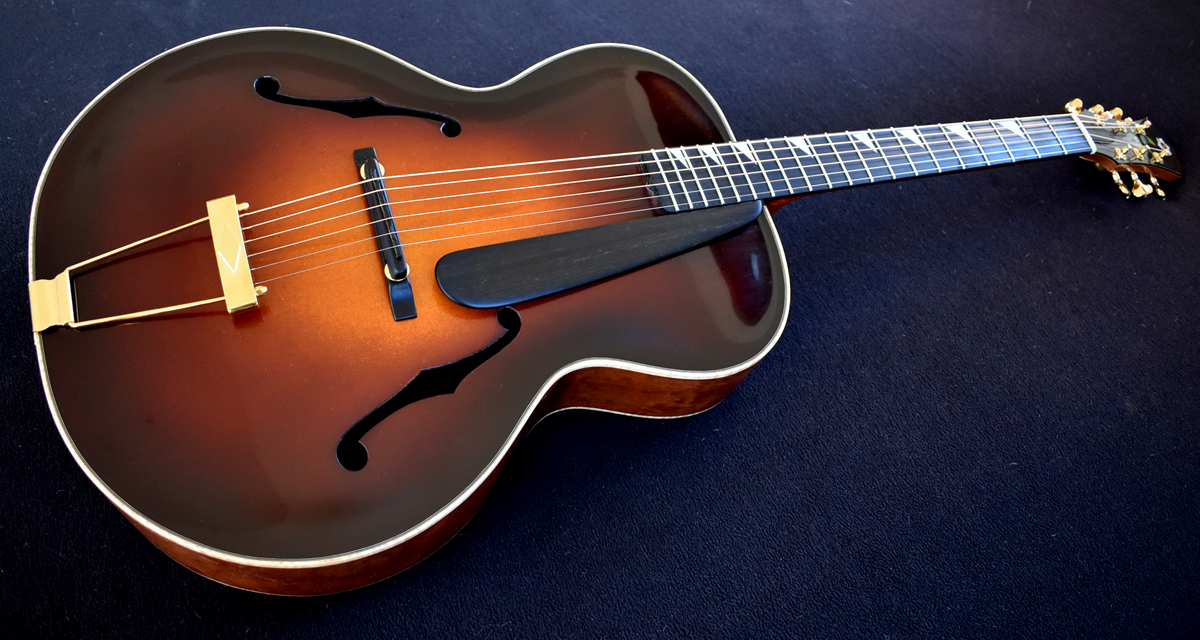
My friend Tom Heywood is an accomplished guitarist and fiddler. For years we discussed what type of guitar he might want. Finally he settled on an archtop modeled after a 1920's Gibson L5. It would best suit his repertoire of jazz standards and swing tunes. Although this was my first archtop guitar, I felt comfortable accepting the commission because of the success I have had in making violin family instruments. We are both happy with the result.

The top is made from Sitka spruce, the back and sides are sapele pommele, the binding is maple, the neck is mahogany, and the fingerboard, pickguard, and bridge are ebony. The scale is 24 7/8". The body is 16" across.
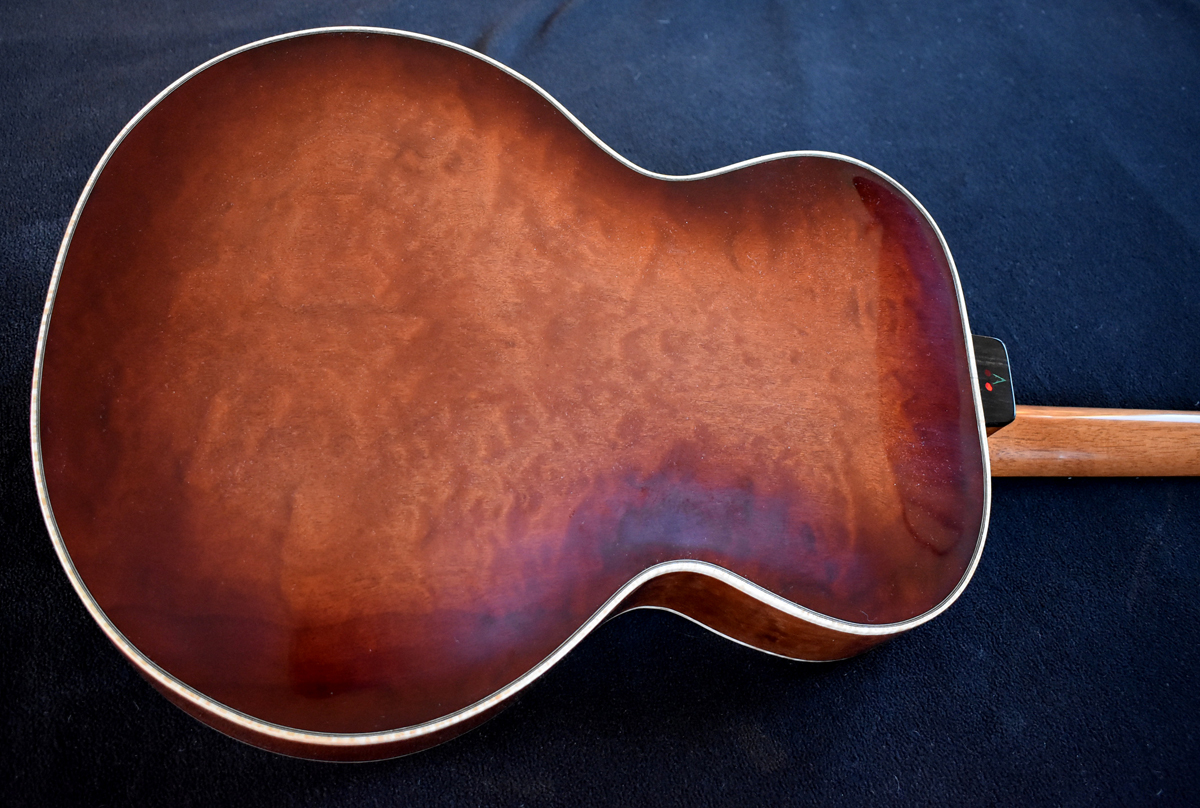
The back was carved from one piece of sapele pommele, an African wood that is similar to mahogany. The pommele figure is similar to qulited or blister maple.
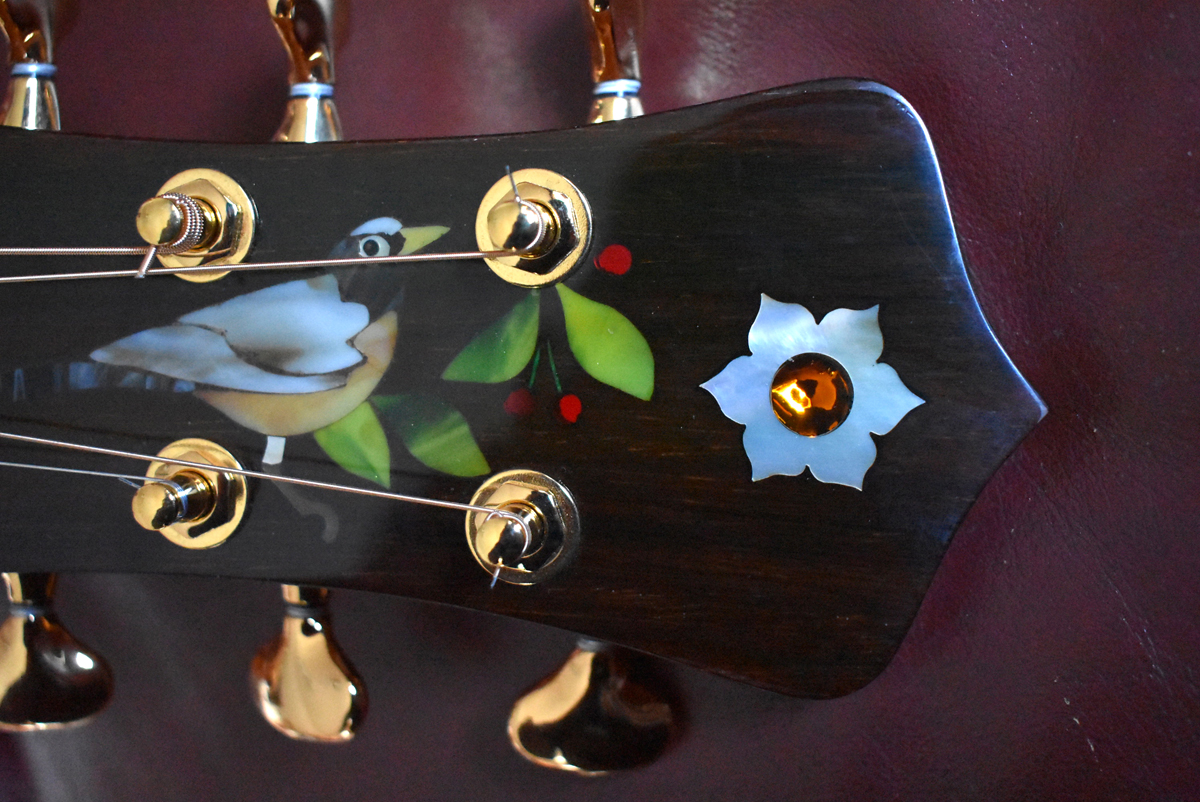
Tom wanted a Robin for the headstock inlay. He enjoys seeing them as a harbinger of spring. I see them as raiders of my cherry trees. The inlay is made of glass and mother of pearl. The cherries and the center of my lotus flower logo are mirrored glass.
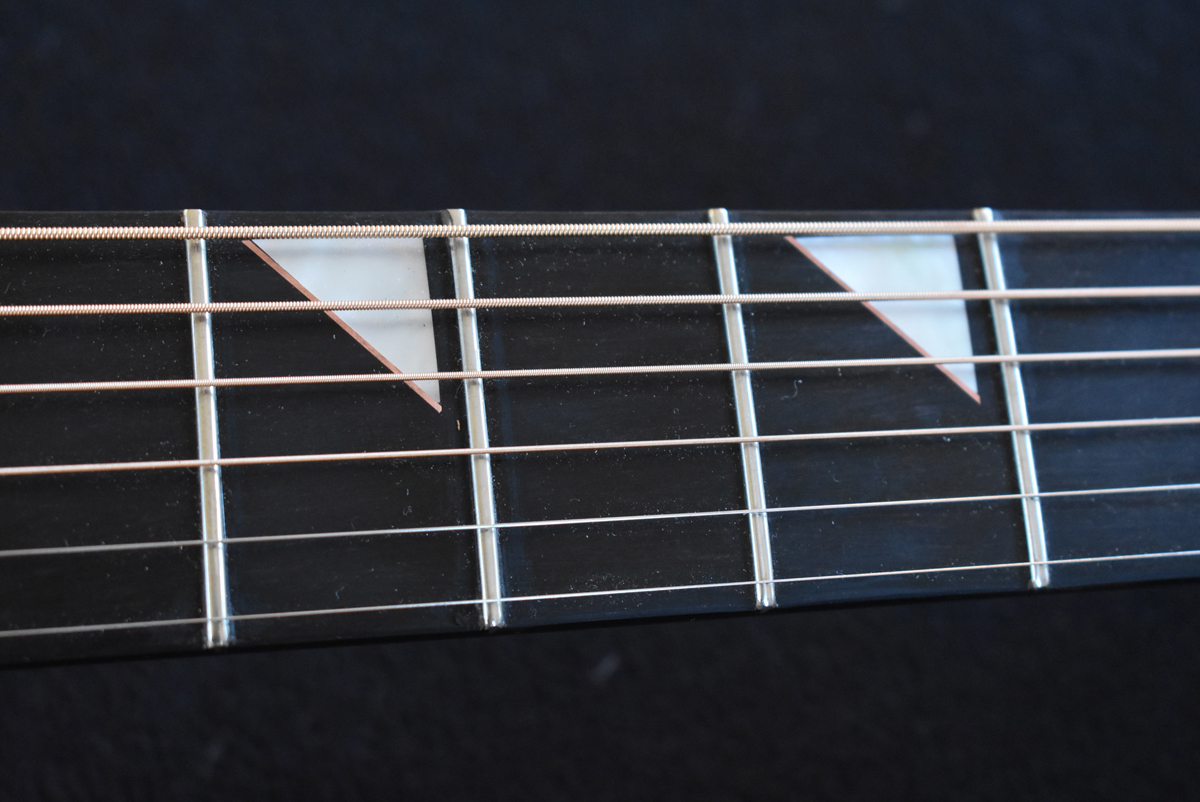
Tom wanted triangles for his position markers. These are made from mother of pearl, and I added a strip of copper along the hypotenuse to jazz them up a bit.
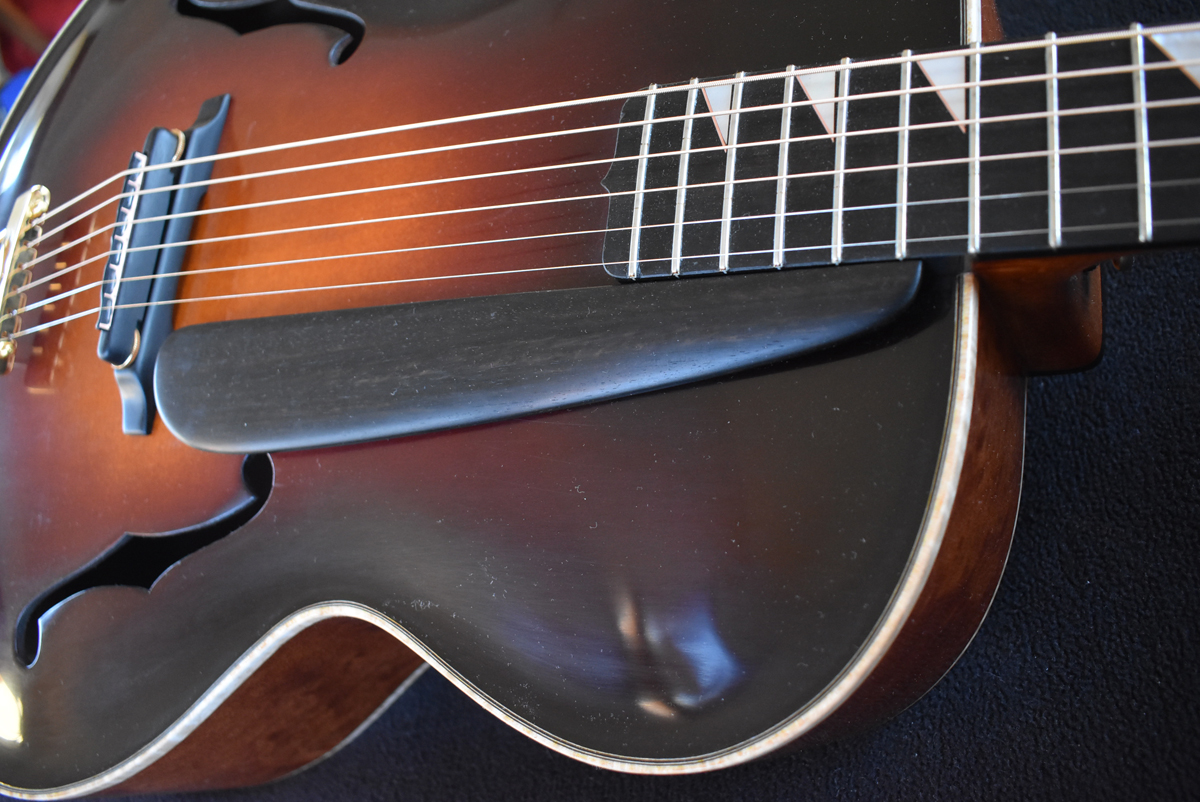
The pickguards on vintage archtop guitars were plastic. I think ebony is much more elegant. The pickguard is attached to the fingerboard extension with a screw and a brass dowel. It floats above the top and does not impede its vibration.
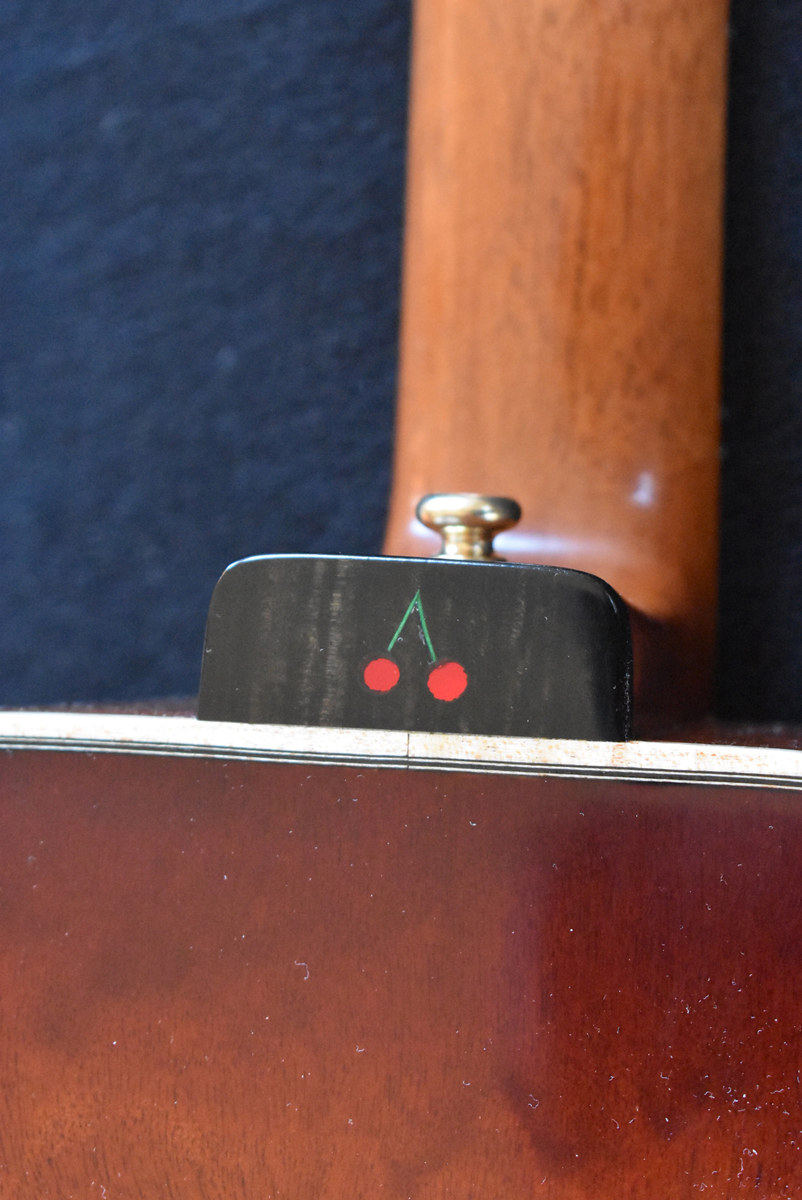
I did this heel cap inlay as a surprise for Tom.
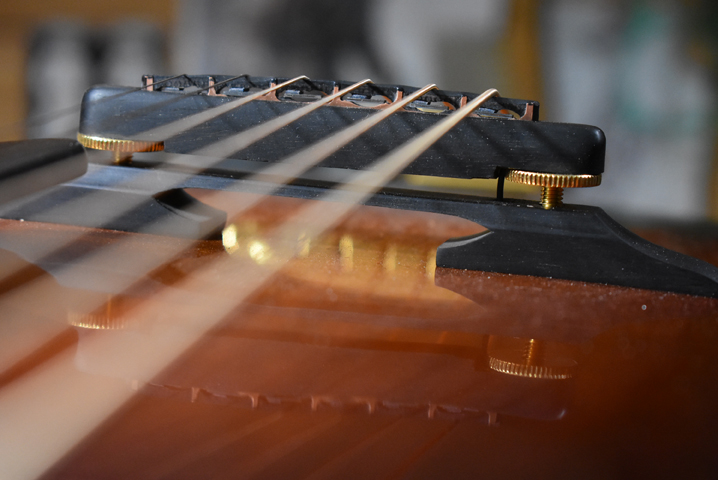
I made the bridge from ebony, with a slot for a Barbera Transducer saddle pickup. This pickup works very well for archtop guitars.

Tom loves his new guitar.
The Making of the Robin Archtop

This section is not meant as a tutorial on building an archtop guitar. I have omitted many steps. I just want to illustrate some of the steps along the way, and to show that a guitar of this type can be made in the traditional way, with most of the steps being done with hand tools.
I started with a spruce log that I got on Chichagof Island. This log has a creamy white color, even grain, and no twist, as you can see by the split face on the right side of the set.
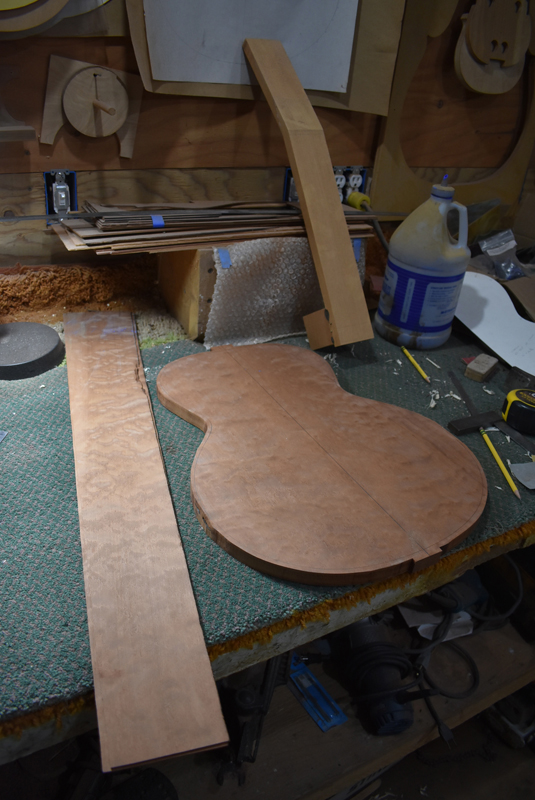
The back and sides are made of sapele, which has a grain figure called pommele. The interlocking grain makes this wood hard to bend, and hard to carve. I was able to get quite a bit of this sapele from Edensaw Woods years ago. Some of the boards are over two feet wide. It was nice to be able to start with a back made from one solid piece with no joint in the middle. There is a mid-line in the photo, but it's just pencil. The neck is made from Honduras mahogany.
Carving spruce with sharp tools is a joy. The grain is soft, predictable, and consistent. At its best it's like carving butter. I use small planes to do the initial shaping, then move to gouges for the concave sections. A lot of the shaping is done by eye and by feel. When you run your hand over the surface it's easy to feel irregularities in the curves. The consistent thickness of the perimeter edge is established with a tool called a safety planer on a drill press.
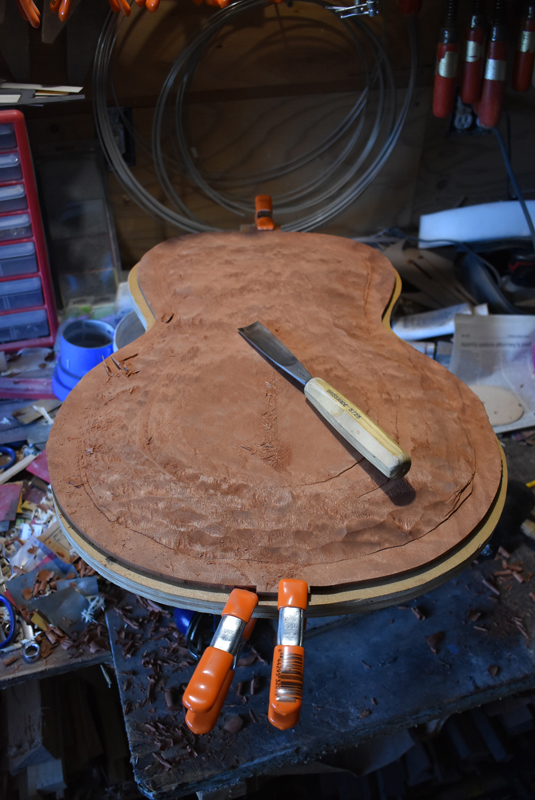
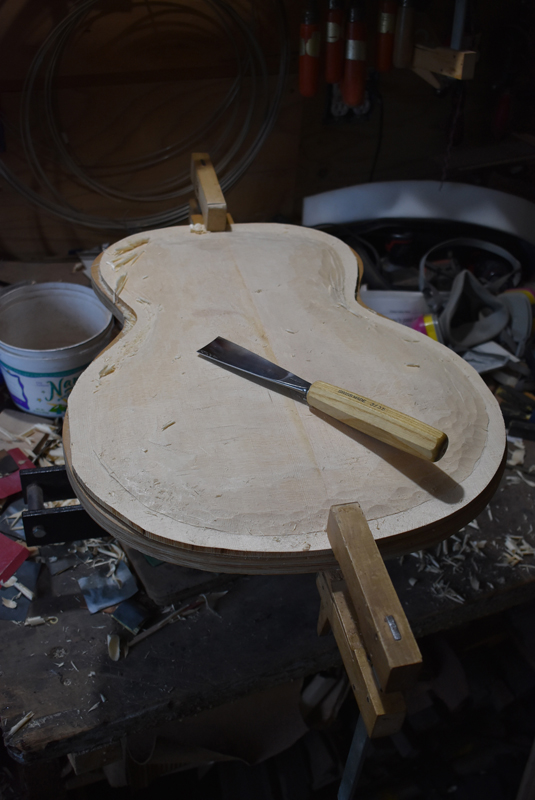
Carving the sapele back is an entirely different experience. The twisty grain wants to tear out everywhere. Using chisels and gouges gently hit with a rubber mallet, and working strictly across the grain seems to work best.
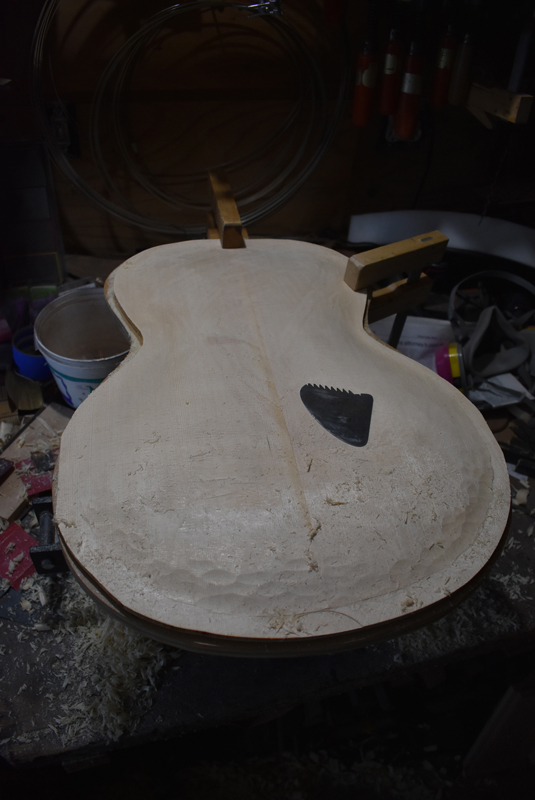
Once the rough shape is established with planes and gouges I move to scrapers for the final shaping. The best scrapers are made from the broken pieces of Japanes saws. When I first started using these saws I did not realize how brittle they are. Fortunately, the pieces can be filed into whatever shape is needed. This my favorite scraper. It has a variety of curves that fit for just about any application. The Japanese white steel makes a very sharp scraper that holds an edge well.
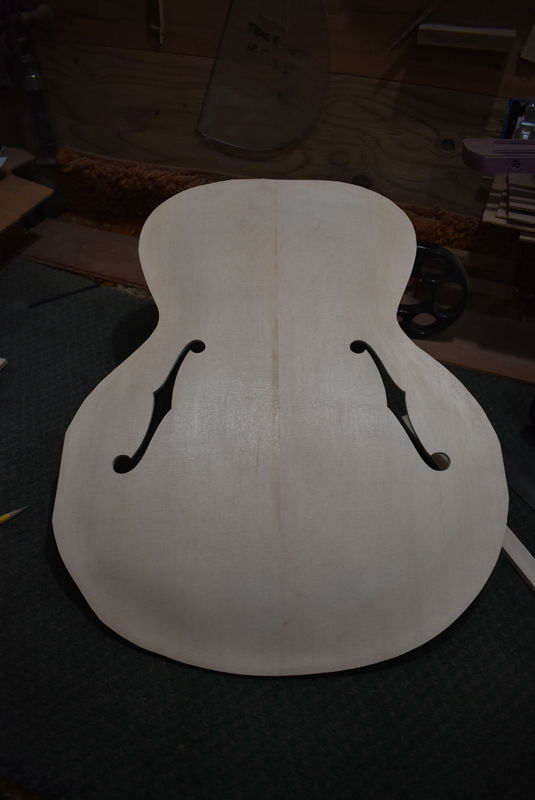
I don't have a photo of carving out the inside of the top, but it is identical to carving the outside - gouges followed by scrapers. I stop often to check the thickness of the top as I remove material from the inside. Once the top is scraped down close to the final thickness, the f holes are laid out and cut. I use a hand drill to start the holes, and then shape the f hole to the lines with a violin maker's knife.

This the finished top, scraped to thickness, f holes cut, braces glued on and carved to shape. Tom and I discussed the different styles of bracing for archtop guitars, and we settled on the traditional V bracing pattern that was used on the early Gibsons.
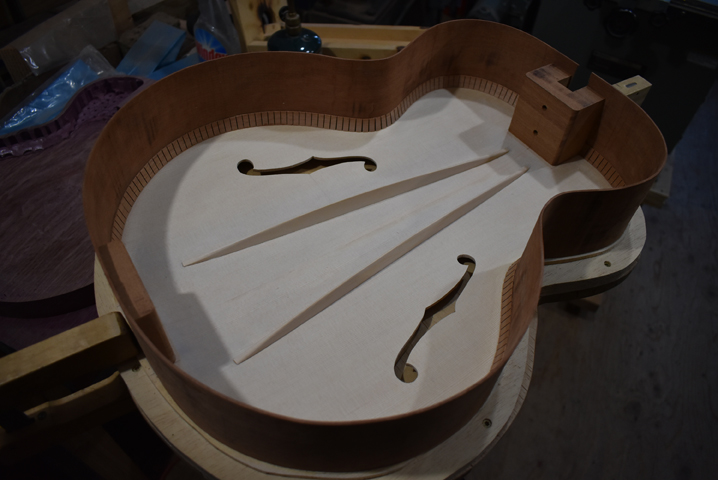
The sides have now been glued to the top. Most luthiers use an outer mold to assemble the box. I was taught to use a method called "in the air", where the top is face down on a work board, and the sides are glued to a line drawn on the inside of the top. This method requires that you have to accurately bend the sides to the pattern, and then glue them accurately to the lines.
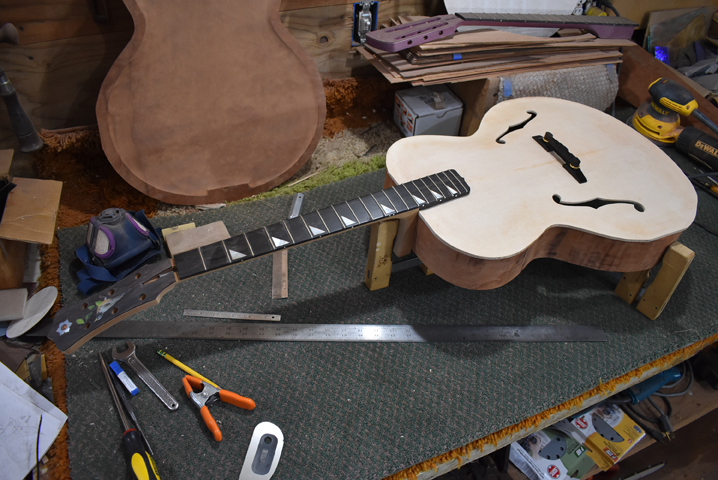
In this photo I'm checking the neck angle. This is critical, as the bridge has only a small range of movement. As you can see, the back is not yet attached. The beauty of the bolt-on neck attachment that I use is that the neck can be taken on and off easily.

At this point, the back is on, the neck is attached, the binding and purfling are done, and everything is readied for finish. The fingerboard is masked from the lacquer spray. The whole guitar was sealed, and then the color coats went on. I had Tom come to the shop when I sprayed the color to make sure that the sunburst was what he wanted.
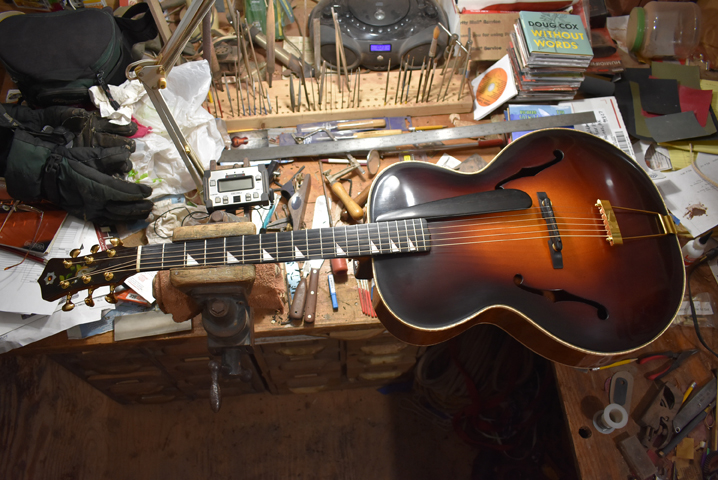 After the lacquer is sanded and polished there is still a lot of important work to do. The tailpiece and the tuning machines are attached. The nut is made from bone. The bridge placement and height are adjusted so that the action and intonation are correct, and the pickup is wired in. The ebony pick guard is made and attached. It's an exciting moment when the strings are attached and you can finally hear the voice of the instrument.

After the guitar is strung, and I have worked through all the details of the set up, I like to have the musician come to the shop for a test drive. That way I can make any adjustments that might be necessary. Hey Tom - do you know any jazz chords? He does. Many.